Spicy Tofu Bánh Mì

vm-lgflag

Bánh Mì is the Vietnamese word for bread and is generally used to refer to the street-food sandwiches that you can find all over Vietnam (and now the rest of the world). I first developed a love for Vietnamese food (mainly phở ga) when I was living overseas in Asia, but it was not until I returned to the US that I ate Bánh Mì regularly. The suburban greater Seattle-area town that I grew up in had a rather large population of immigrants, mainly Korean and Vietnamese, which meant that there were a plethora of cheap restaurants to peruse (and peruse I did!). Of course I have my favorite family run restaurant and they have the absolute best spicy tofu Bánh Mì. Naturally the bar was set pretty high and this is my attempt to recreate their delicious sandwich.

The bread used to make Bánh Mì is always a french baguette. This is left over from French colonization, and though it is similar to a French style baguette they make them a little differently and usually is a little softer to eat. The Bánh Mì is a cultural fusion of classic french style (baguette, mayonnaise, and traditionally pate) and classic Vietnamese flavors like cilantro, jalapeno, cucumber and pickled carrots and daikon radish. With this formula you can make any kind of Bánh Mì, with almost any kind of meat. The most common meat fillings are sliced beef, pork belly and vietnamese meatballs. Today, I will be making my favorite, spicy tofu Bánh Mì, which is not normally something that you would find on the streets of Vietnam but they do serve them during celebrations at Buddist temples.

Ingredients:

  • French Baguette
  • 1 package of firm tofu
  • a hand full of cilantro
  • Sliced cucumber
  • Sliced jalapeno
  • 1 medium carrot (shredded)
  • 1 medium daikon radish (shredded)

For the picked carrot and daikon:

  • 1/4 a cup of sugar
  • 1 cup of white vinegar
  • 1 tsp salt
  • 1 cup of warm water

For the spicy sauce:

  • 2 tbsp Sriracha hot sauce
  • 1 tbsp hoisin sauce
  • 1 tbsp korean gochujang
  • 1 tbsp thai sambal sauce
  • a tsp of agave or honey

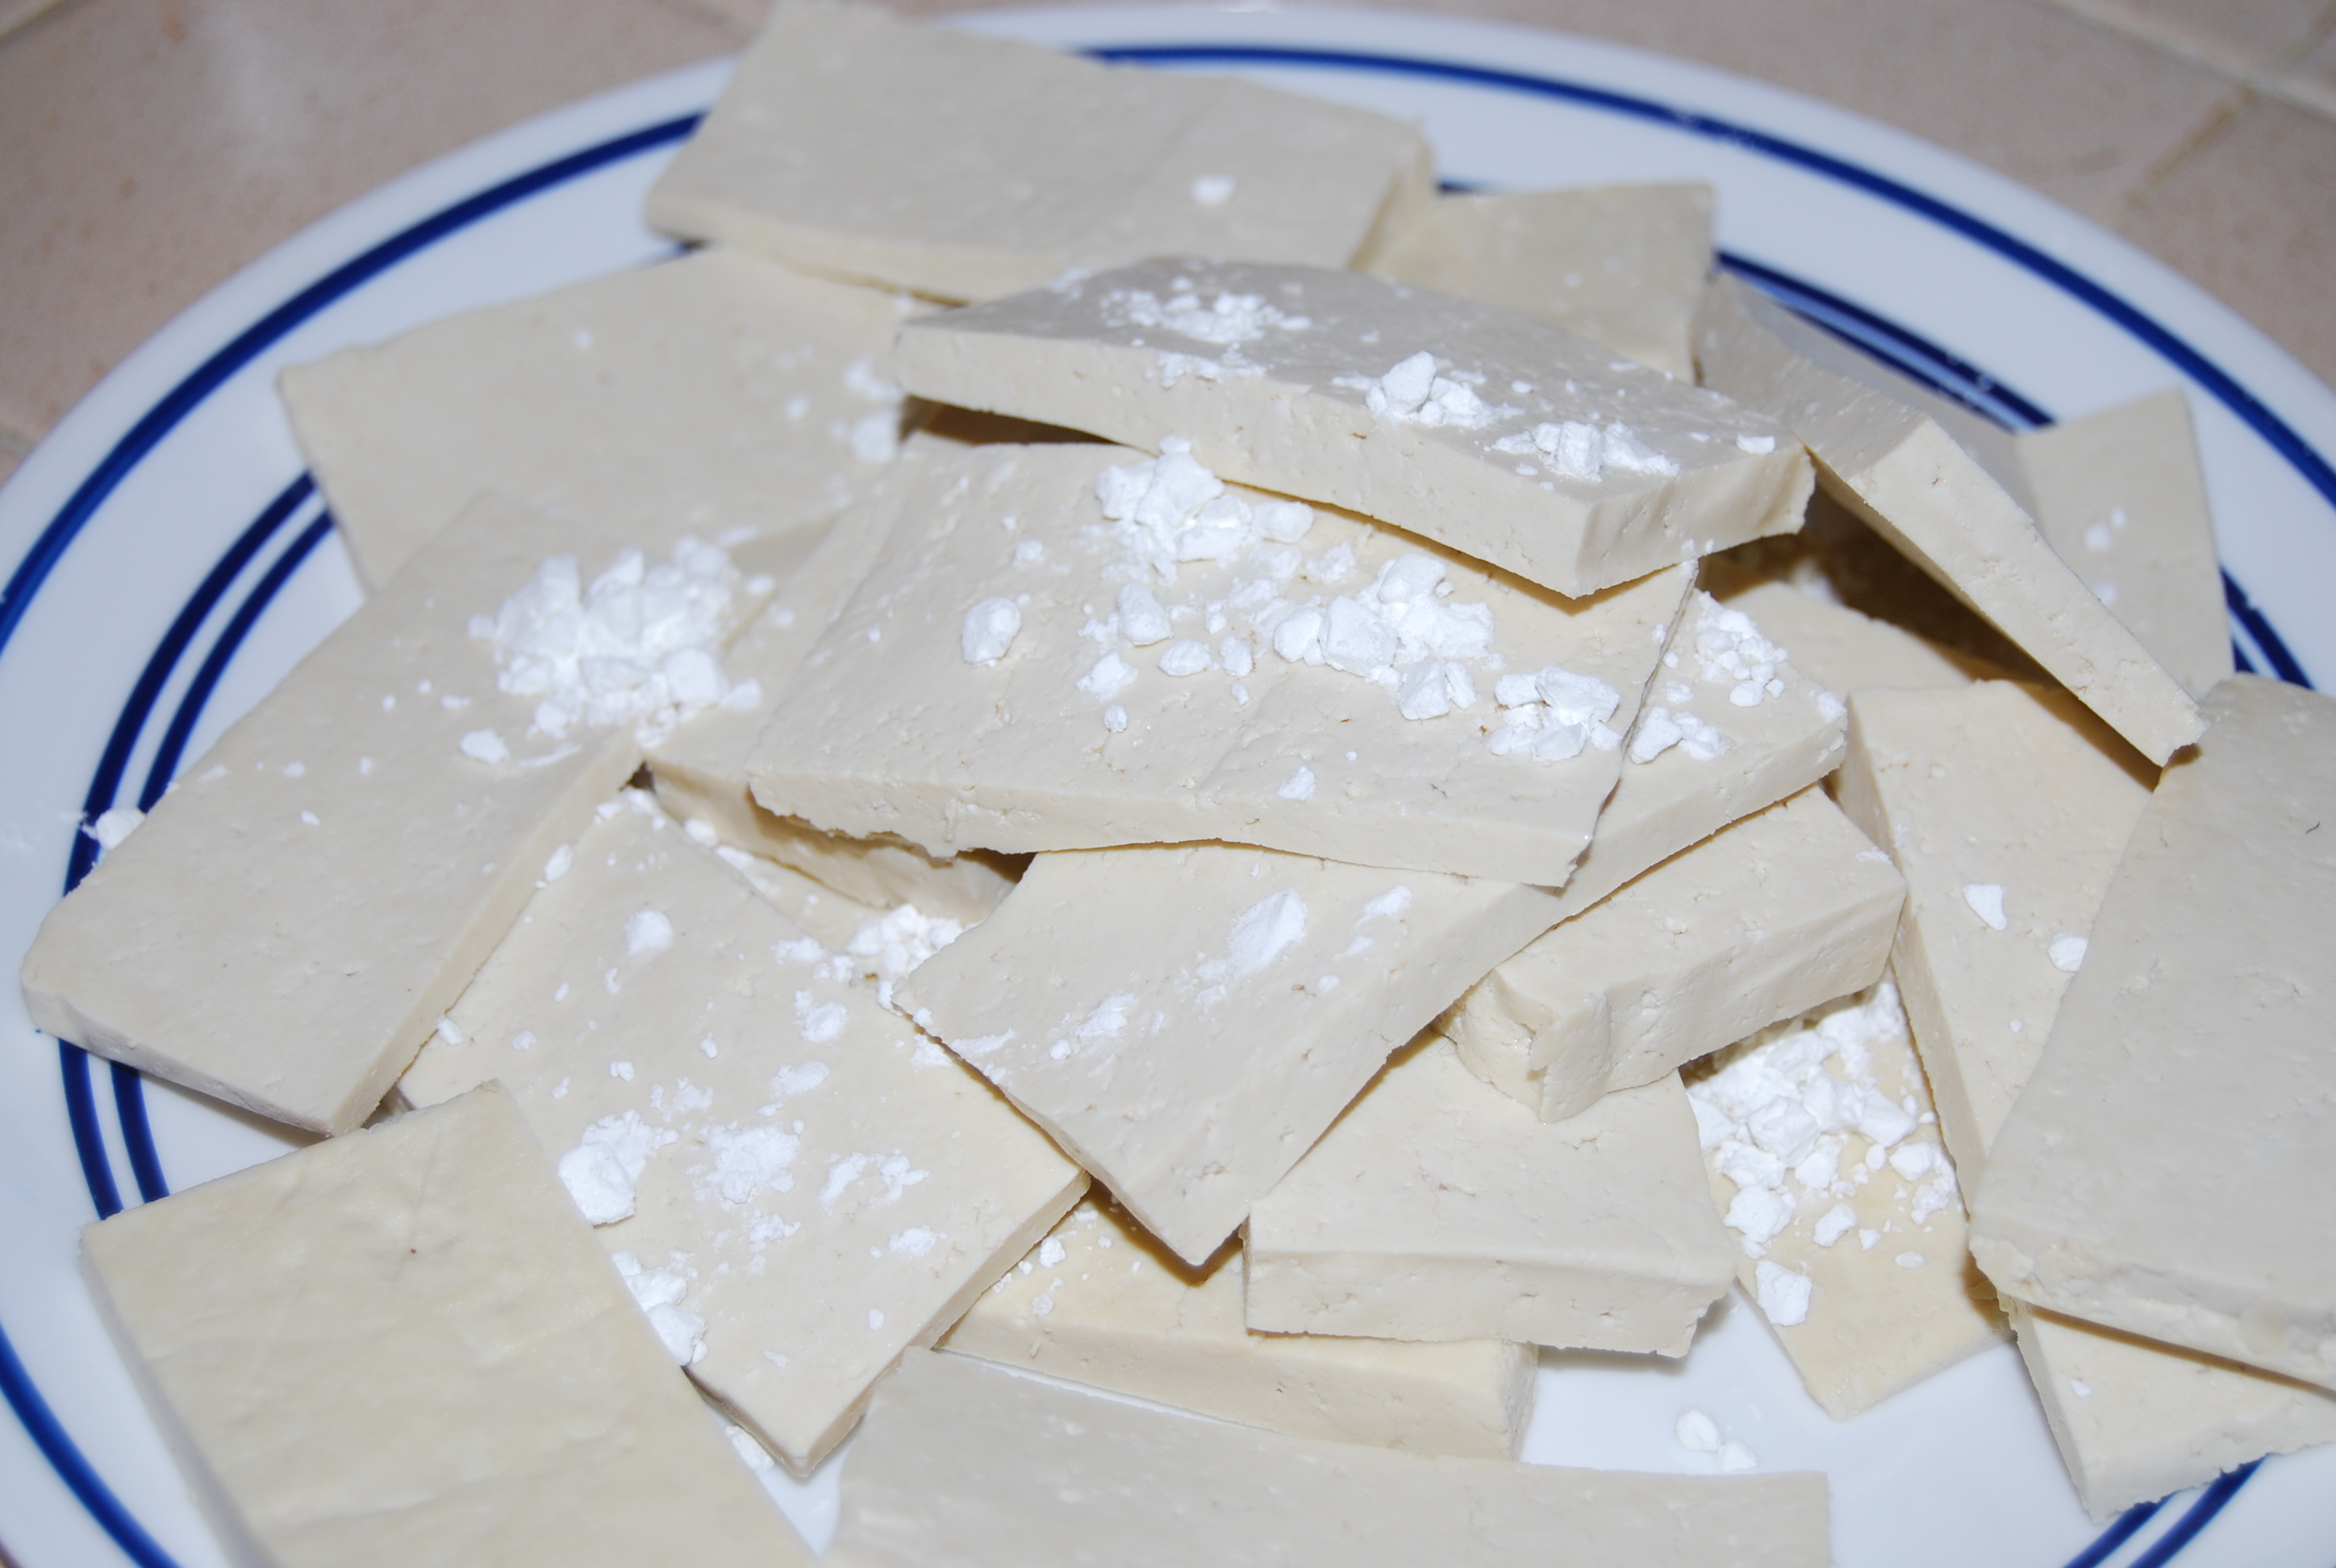
First things first, the tofu! Preheat that oven to 400 degrees and lightly coat a baking tray with oil. Slice the tofu about 1/4 of an inch think and coat them with a little bit of corn starch (this absorbs the moisture and makes them a little crunchier).

DSC_0122

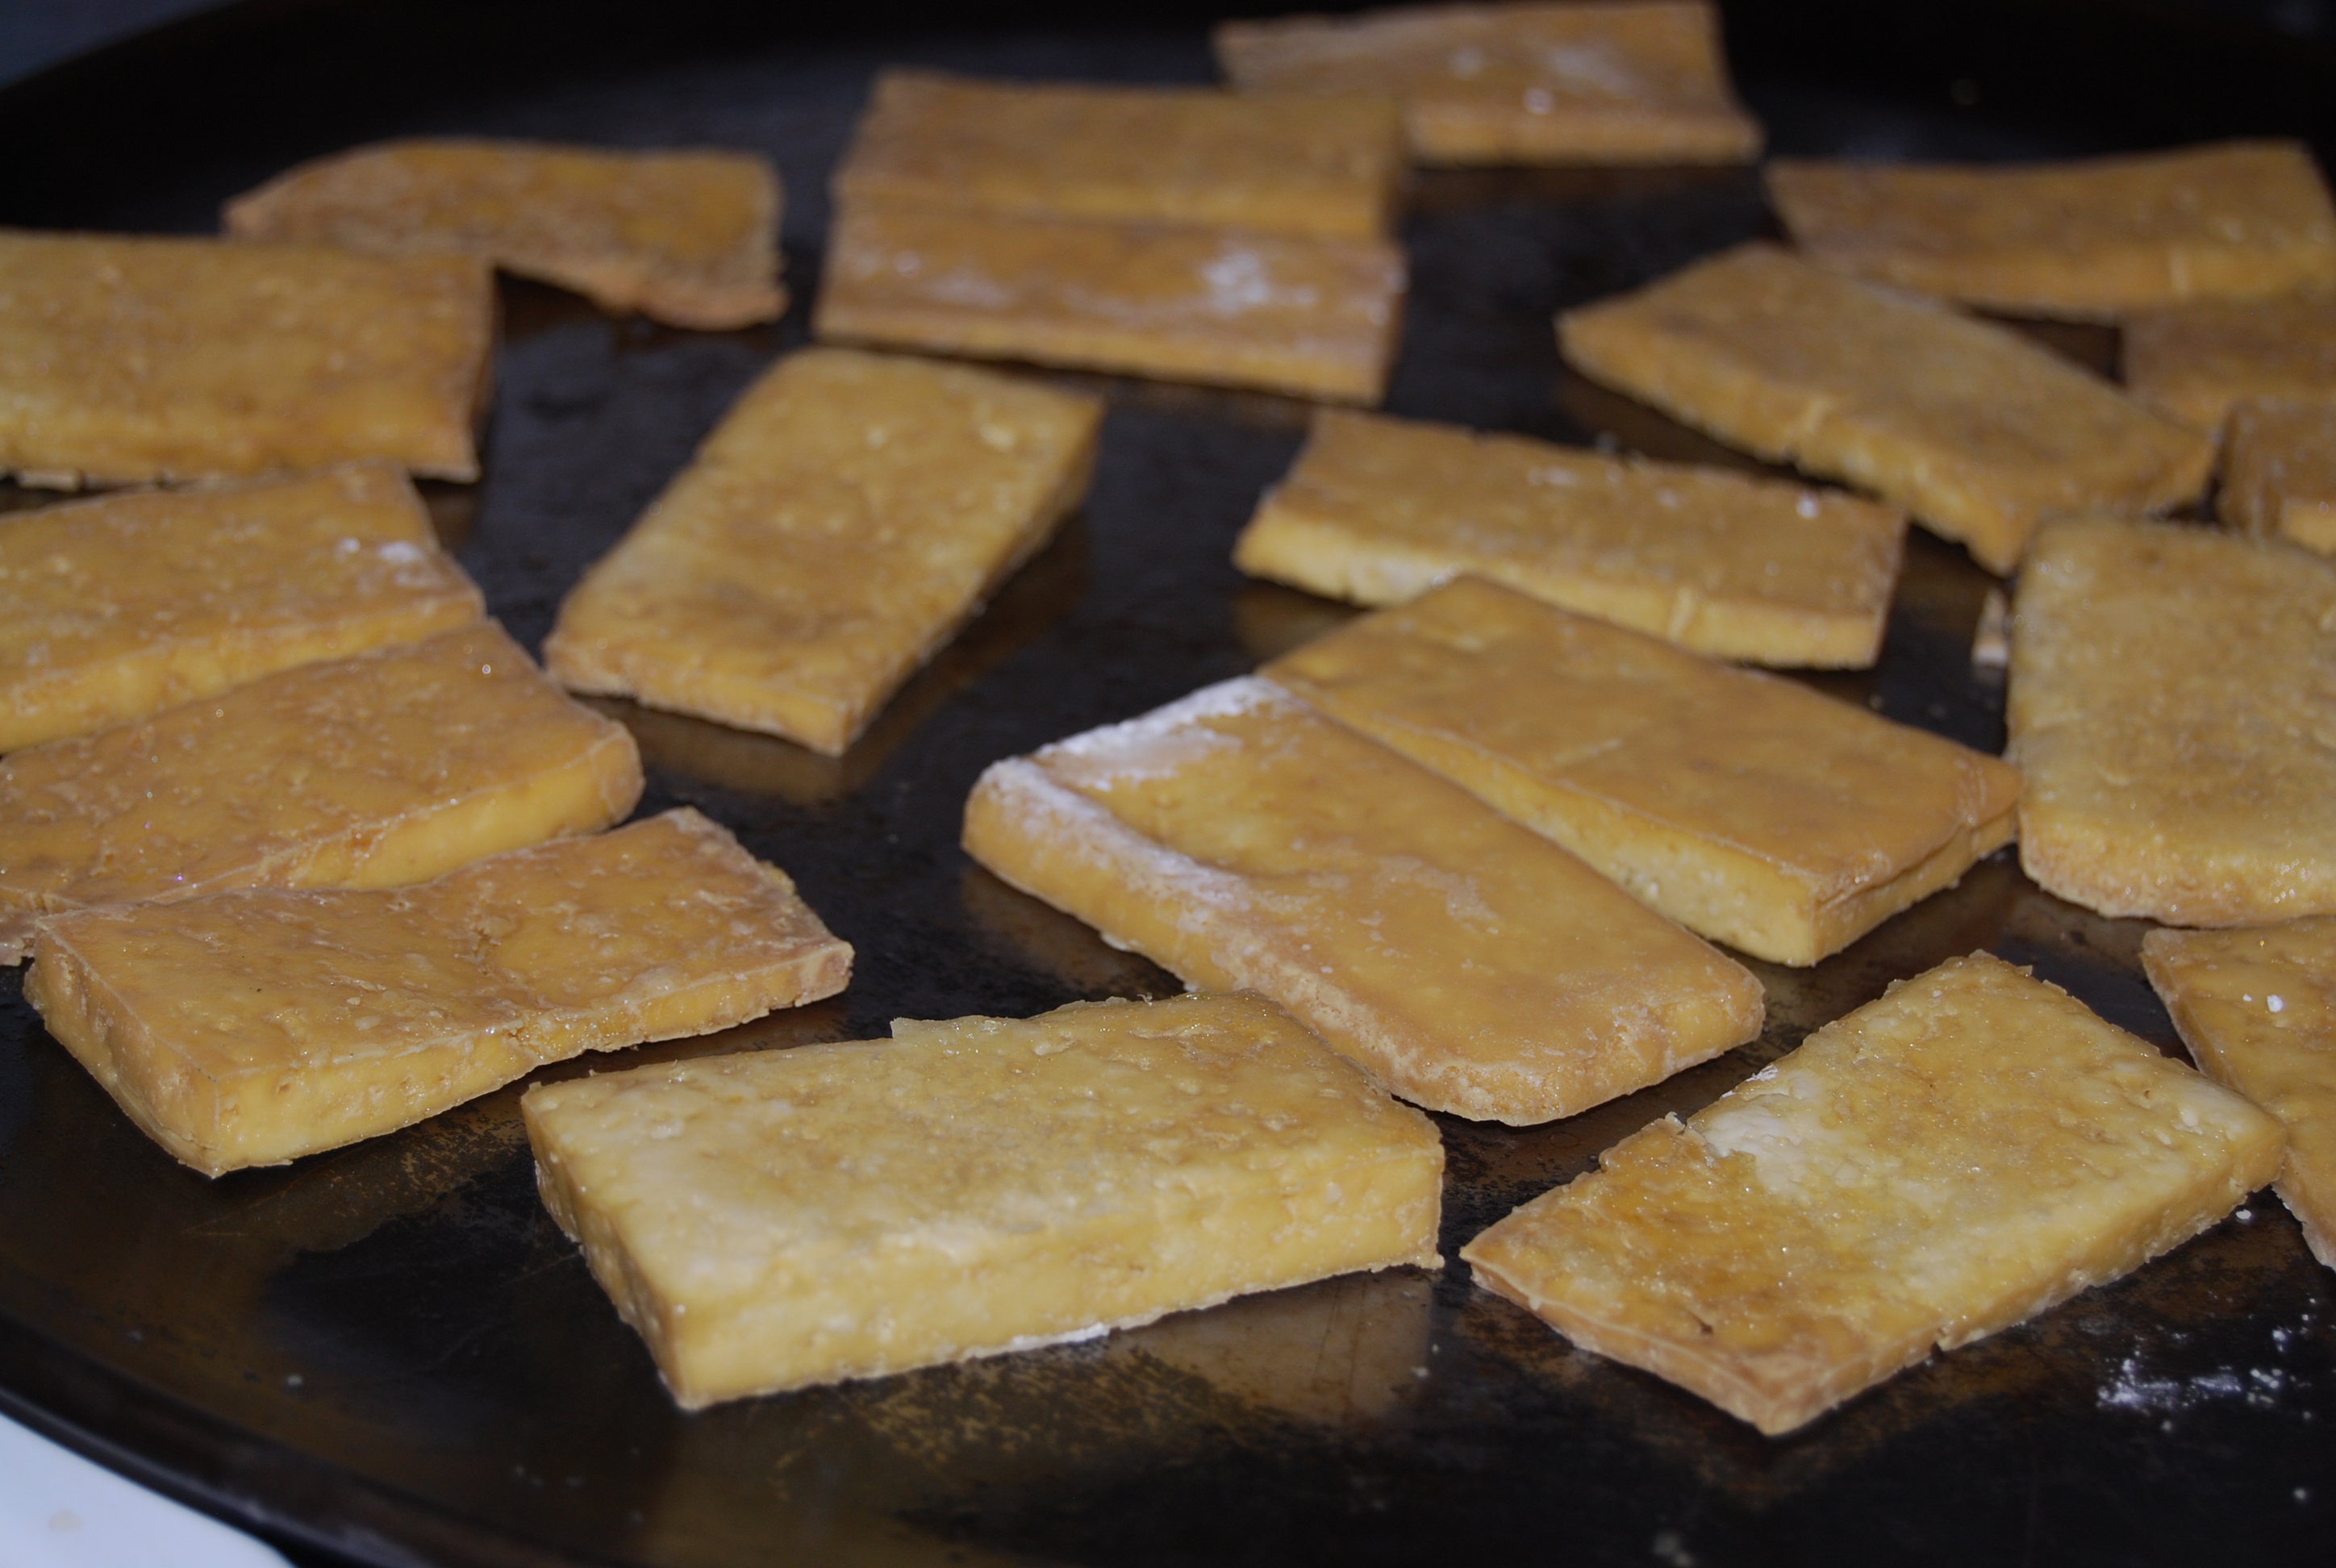
You can drench them in sauce and then bake them but I find it doesn’t really add much more flavor in the end and I usually just drench then in sauce after they are done baking. The tofu should bake for 30 minutes and they should be flipped halfway through the baking process. When it is done it will look something like this:

DSC_0129

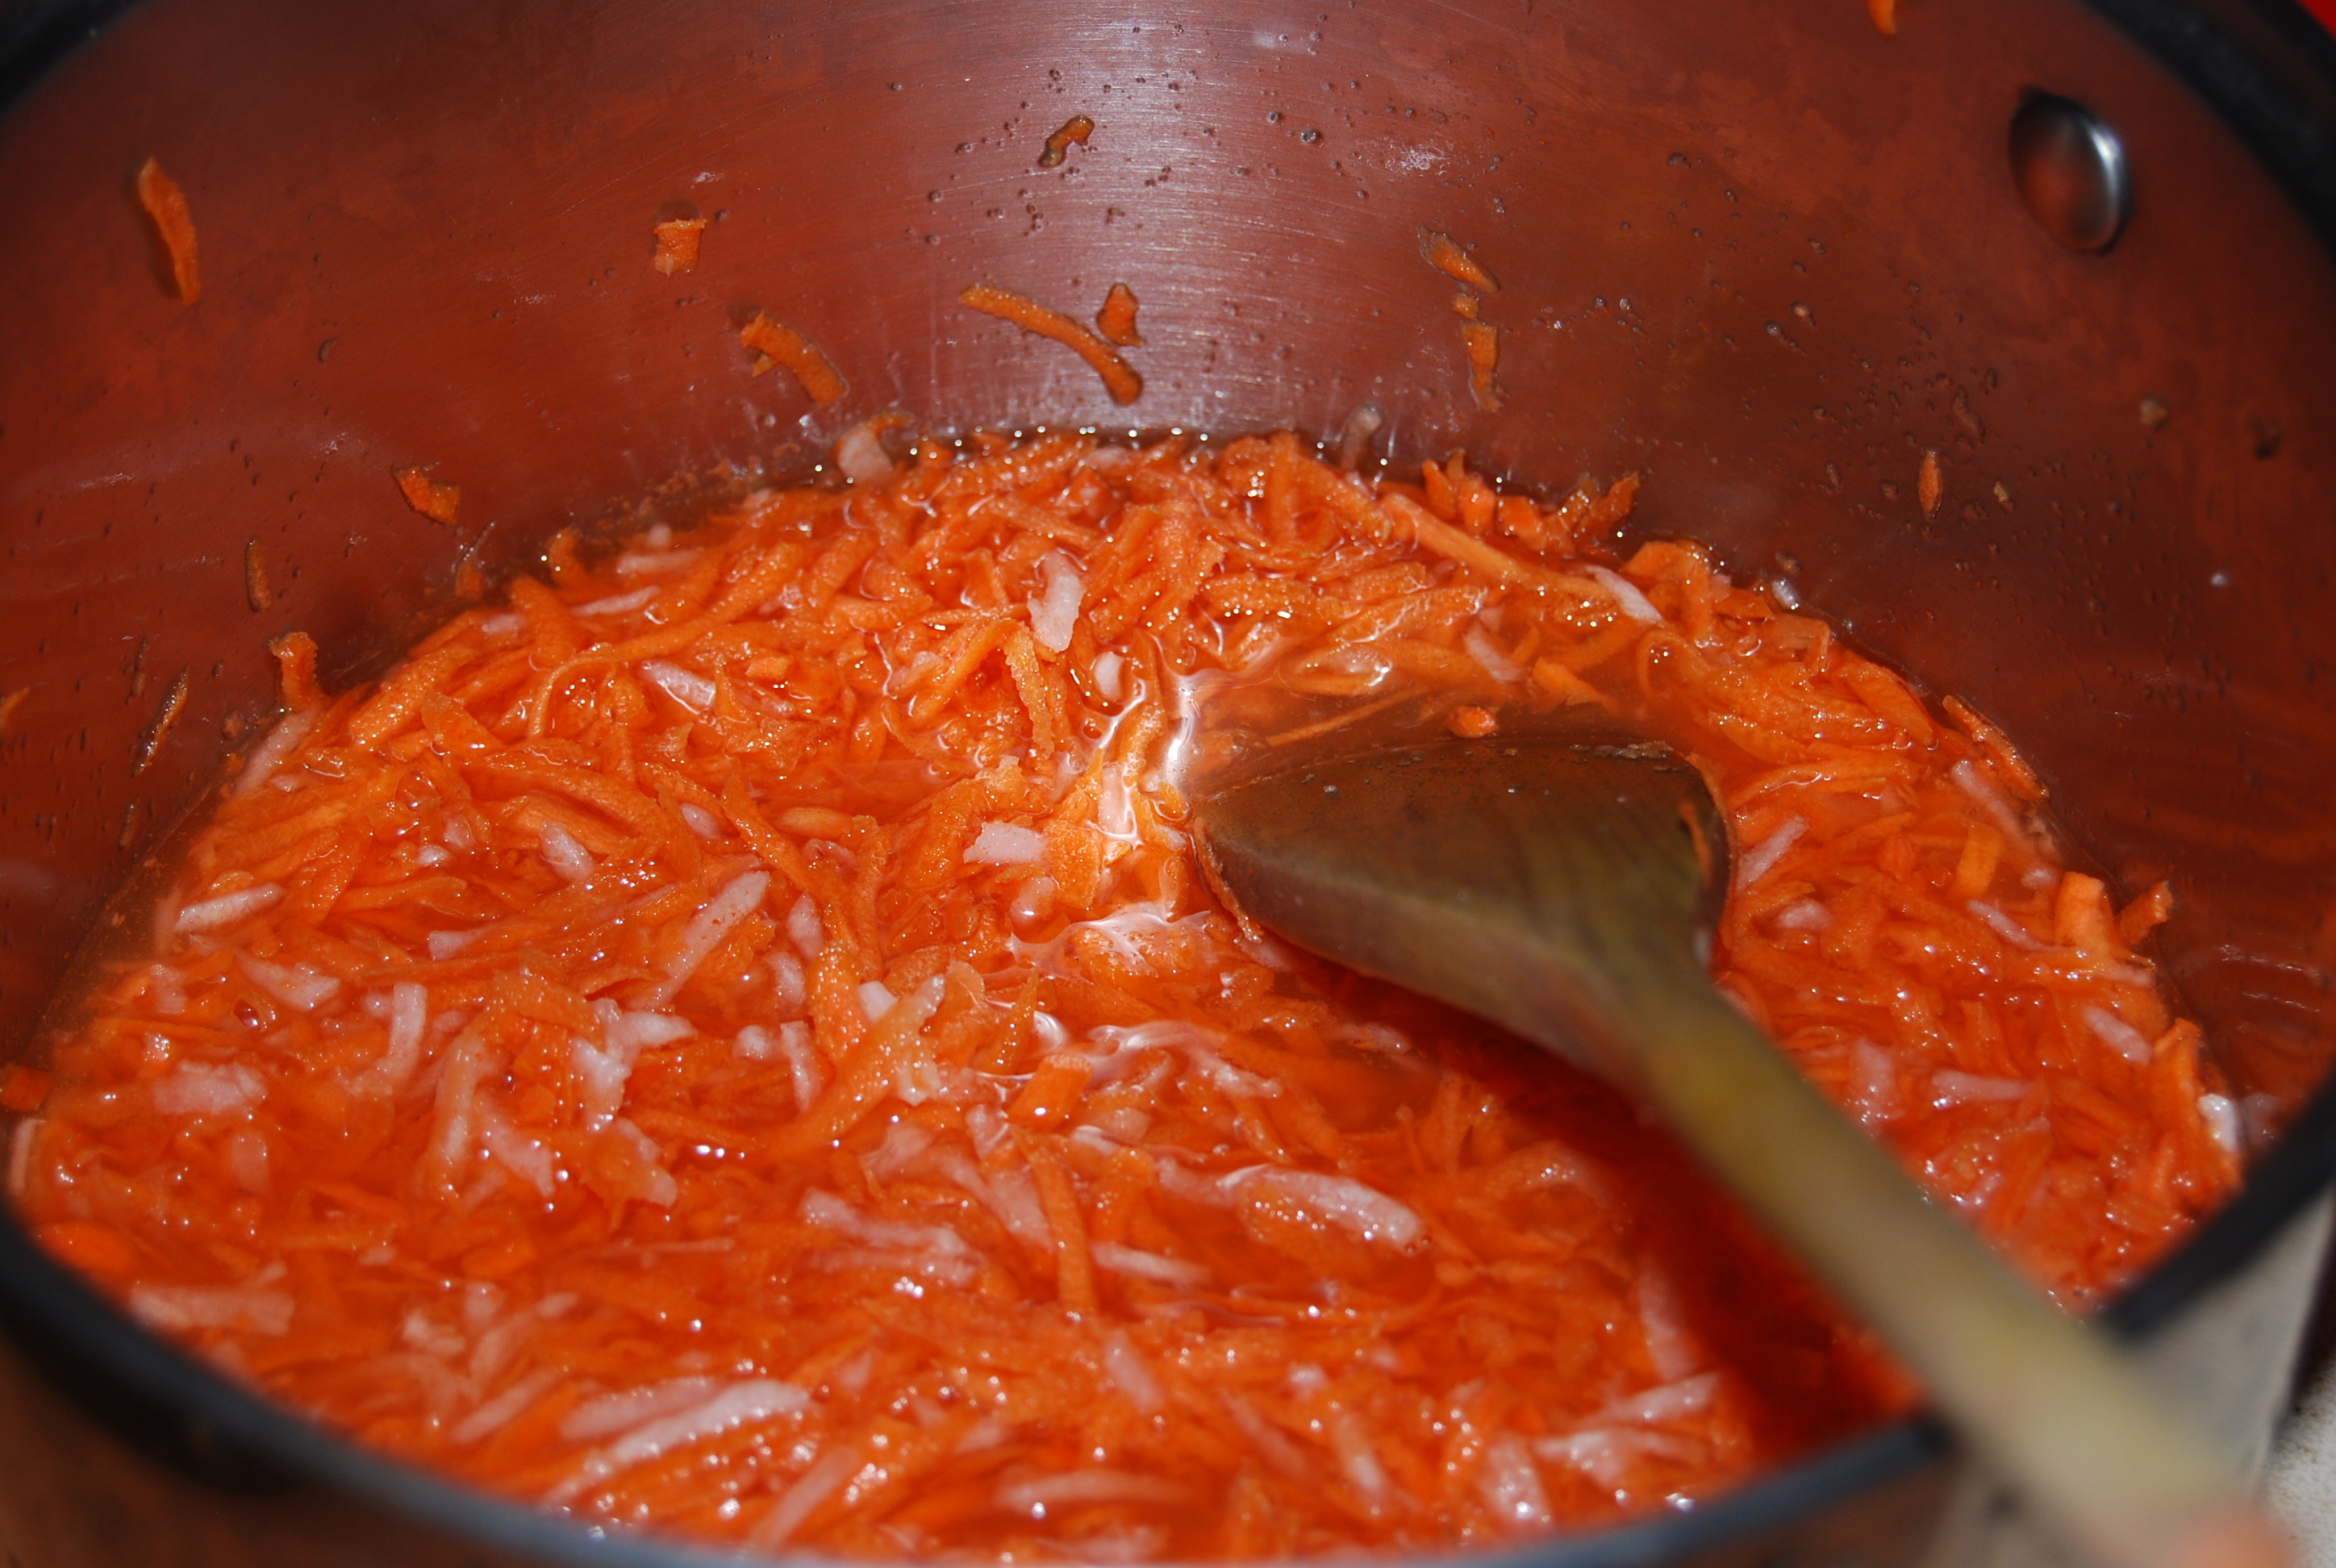
While that is baking, we can start on the picked carrots and daikon. Grate the carrots and daikon by hand or by food processor. Add in the rest of the ingredients (water, vinegar, sugar, salt) and leave it to pickle. You can also do this the night before if you really want to pickle the carrots and daikon, but it still tastes pretty good either way. Let it mellow out while the tofu is baking.

DSC_0124

Now for the sauce! Combine all of the ingredients into a small bowl.

DSC_0127
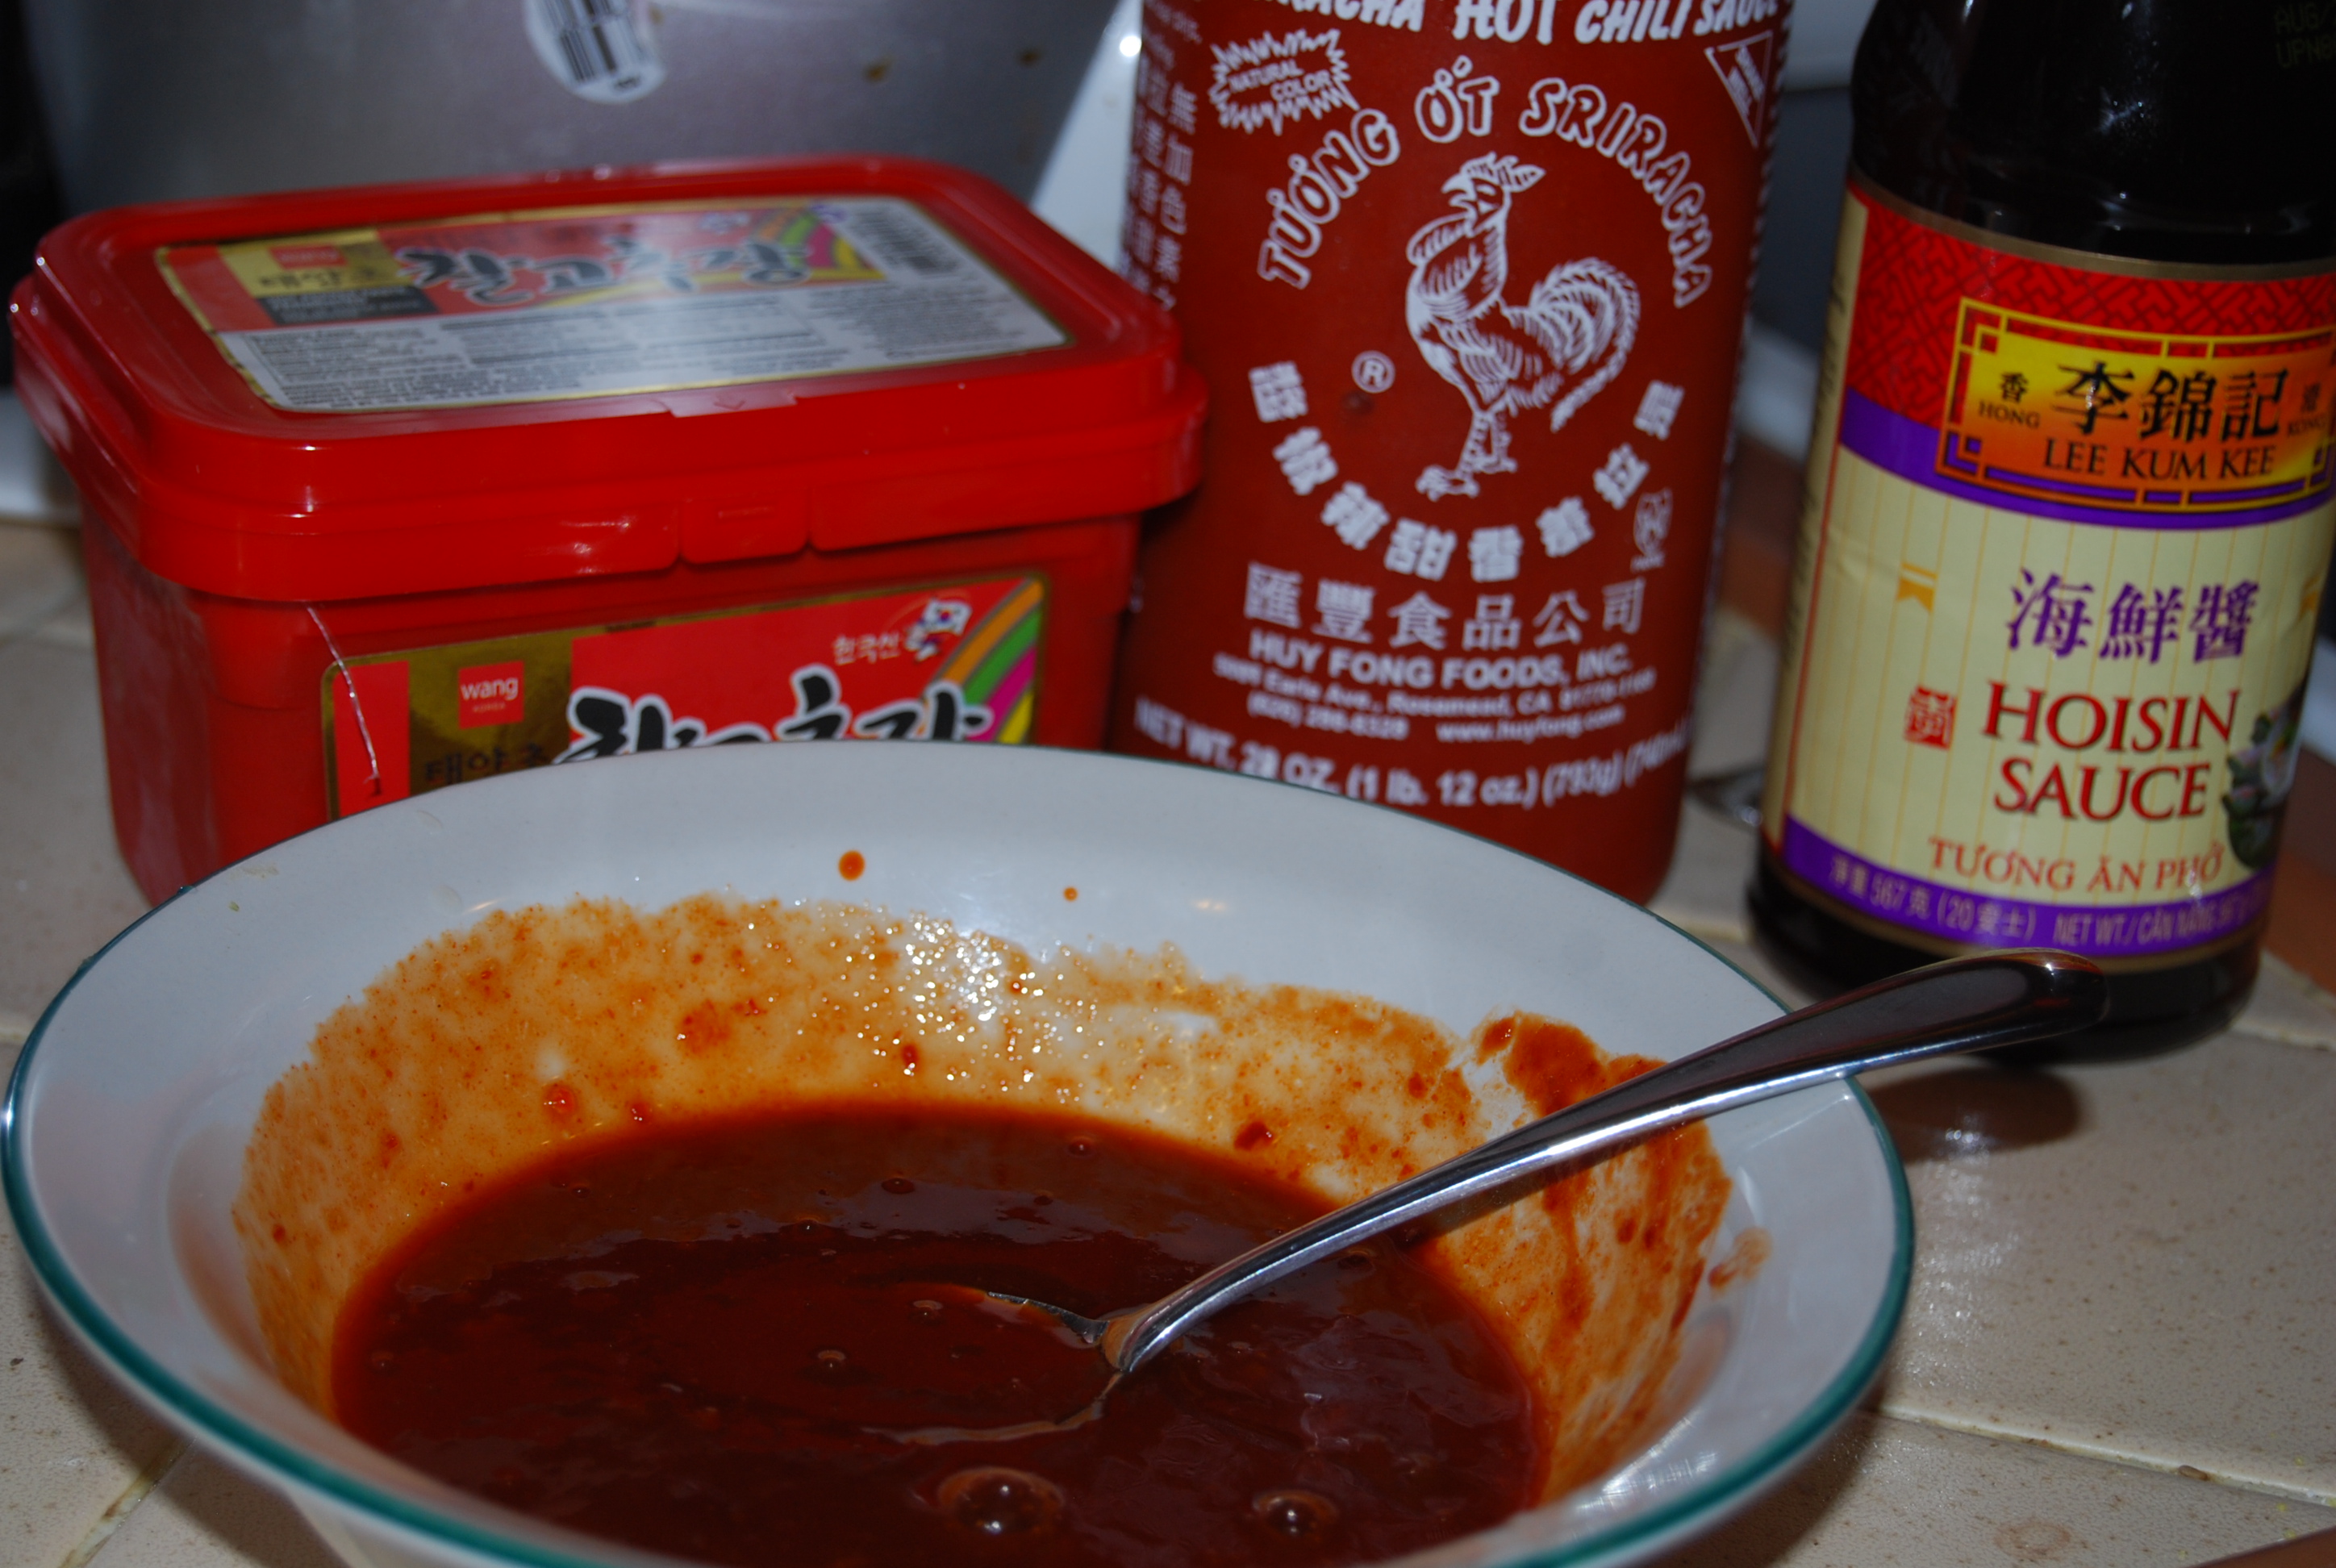
All of these sauces can be found at your local asian grocery store, or online. Obviously you can add more spice if that’s what you like, I always like it super spicy.

Slice up the Baguette and toast if desired.

Now it is time to build our sandwich. Generally a Bánh Mì sandwich has mayo in it, but since I hate mayo I just decided to forgo it. If you like mayo there are plenty of mayo sriracha recipes that go great with Bánh Mì online! Slather on some sauce to the bun, then add the tofu when it is ready. Pile on some sliced cucumbers, picked carrot and daikon and stuff in some cilantro and sliced jalapenos (optional).

DSC_0131

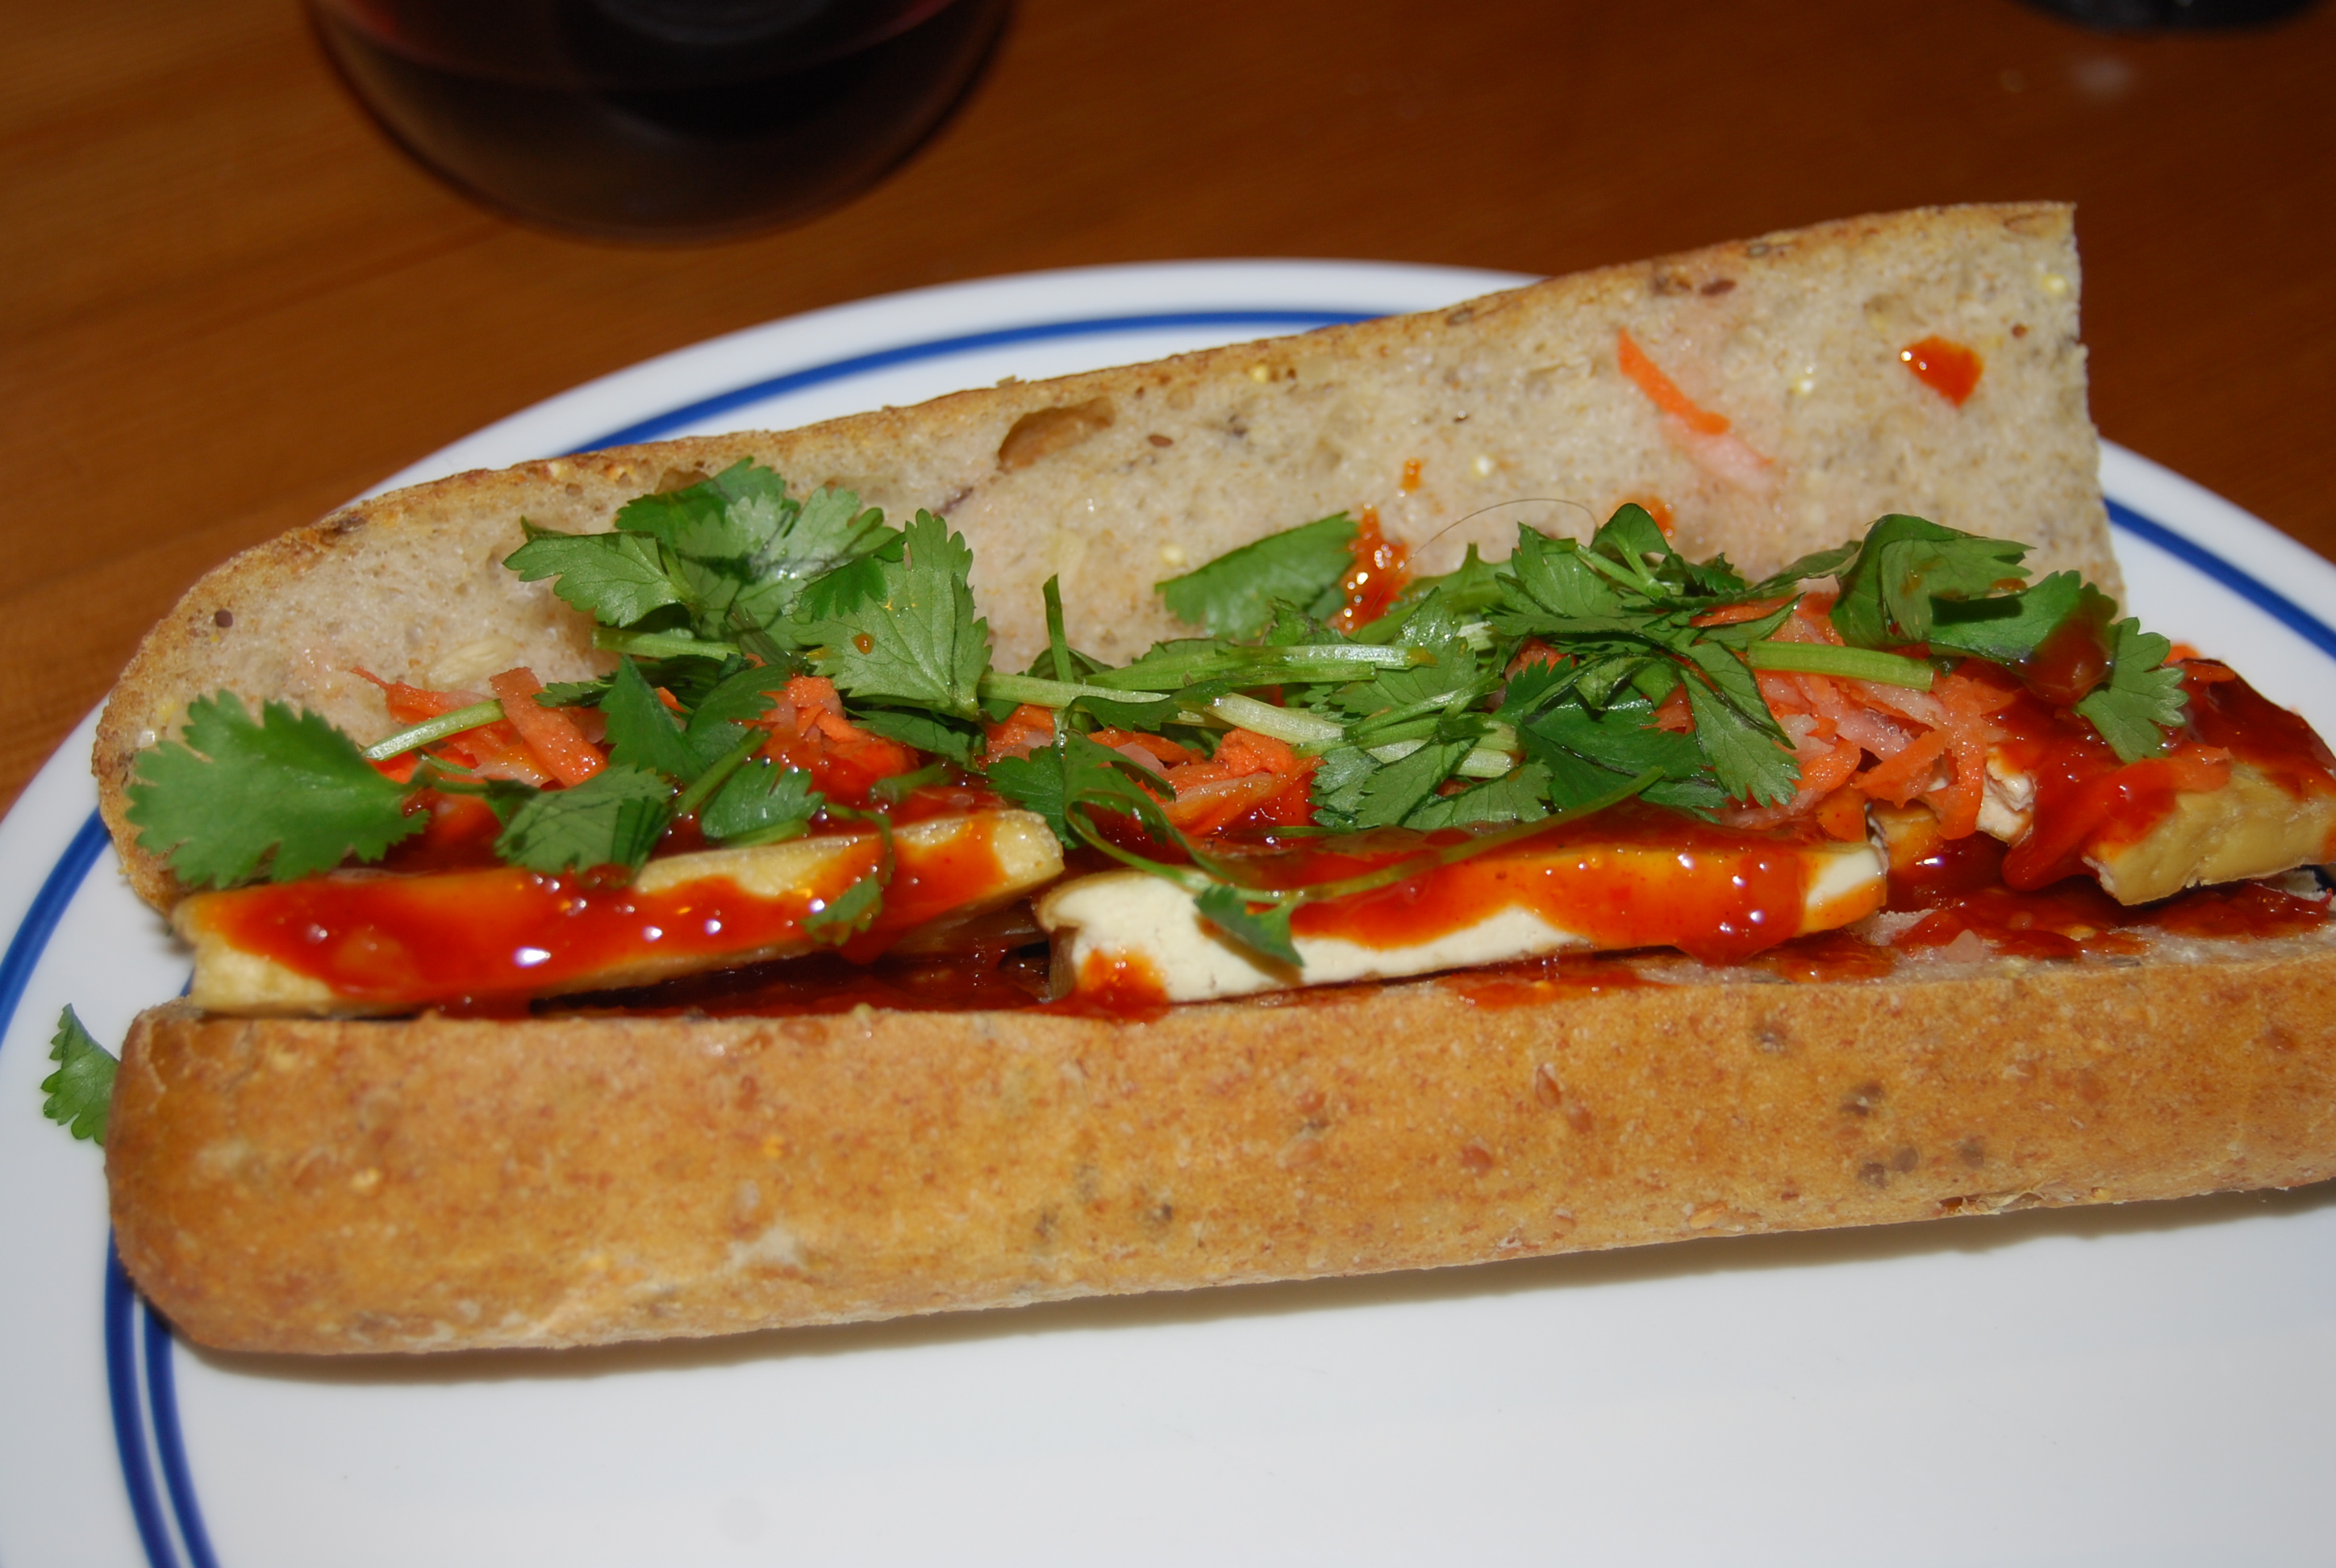
There is no wrong way to build a sandwich! Sit back with a cold beer (or in my case a glass of red wine) and enjoy.

What is your favorite kind of Bánh Mì?

Adobong Manok (Filipino Chicken Adobo)

Flag_of_the_Philippines.svg         Adobo (and Filipino food in general) is probably one of the things I miss most about living in the Philippines. It is known as the dish of the country because every Filipino loves it, and every Filipino family has their own special way to make it.

The Philippines was colonized by the Spanish (for over 300 years!), the Japanese and the Americans. All of these cultures have influenced Filipino cuisine and caused it to be really versatile. Also due to its geographical proximity to Indonesia and China, it has undergone waves of immigration that also impacts some of the cuisine.

While the name of Adobo was given by the Spanish, the cooking method and the dish itself has it’s roots in indigenous tradition. Adobo is the Spanish word for marinade, which is something you definitely have to do in this recipe! Adobo was so popular pre-colonization because the vinegar and soy sauce (or fish sauce known as patis) used in the dish kept the food from spoiling and thus could be kept longer.

Every province makes it a little differently but the basic properties in making it are meat, vinegar and soy sauce. For example, in the south of the Philippines there is a large Muslim population influenced by Indonesia. They tend to add coconut milk and sometimes tumeric to their adobo. I prefer chicken or pork adobo (although not so much pork anymore as I try not to eat red meat), but adobo can be made with any meat or fish.

Lucky for me Adobo is pretty easy to make at home. My biggest qualm is trying to find the right vinegar. I am kind of a stickler about it. Adobo just doesn’t quite taste the same when you don’t use cane vinegar from the Philippines. This can usually be found at any local asian super market. Here is a link to Datu Puti, a famous Philippine vinegar that you are most likely to find in the asian grocery store.

Ingredients:

  • 5 lbs of chicken thigh, leg or breast
  • 1 white onion, diced
  • 4-5 cloves of garlic
  • 2 tbsp. olive oil
  • 1/2 c. of cane vinegar (or white distilled vinegar/cider vinegar)
  • 1/2 c. of soy sauce
  • 1/2 c. of water
  • 1 tbsp. of whole peppercorn
  • 3 bay leaves
  • 1-2 red or green thai chilies (or omit it if you can’t handle it, whatever)

Typically chicken with some bone is best used for this dish. The dark meat and bone seem to add so much more flavor than just using chicken breast. Although I have made it with just chicken breast, it is usually only made when I do not feel like spending a lot of time making dinner.

First things first, slice up an onion any way you typically like it in stews, nice and chunky.

DSC_0106 Then slice up your chili and mince the garlic.

DSC_0109Heat up a stew pot with olive oil. Throw the chicken into a stew pot and brown until the edges are slightly cooked. Add the onions, garlic and chili and stir. You can let it cook for a couple minutes. You should start to smell the wonderful aroma of cooking onions and garlic (it gets me everytime!!).

DSC_0103 Add the cane vinegar, soy sauce, water, bay leaves and peppercorn.

DSC_0111

Bring it up to boil and then turn the heat down and let it simmer for about 30 minutes with the lid on or until the meat is nice and fall off the bone tender.

DSC_0113 If you want to thicken the broth uncover the pot and turn up the heat to medium for about 15 minutes.

If the broth is still too runny for your taste, just mix some of the broth with cornstarch or flour and create a rue. Add that back into the pot and it should thicken it up.

When it’s finish just serve over white or brown rice!

DSC_0114 If you want to add more vegetables, it cooks really well with green beans!

I’ve been trying to eat more veggie-friendly, so one of these days I might try and make a tofu adobo. tempeh adobo or adobo seitan. I found this really great tofu adobo recipe here that I might try my hand at! Maybe you will see a post from me in the future 🙂

As always, enjoy and let me know how you like it! Some days I really miss Filipino food, if you have a favorite Filipino recipe let me know!

Baked Spaghetti Squash (GF/Paleo Alternative)

us-lgflag

        I was first introduced to Spaghetti Squash by my roommate while I was in college. It was a cheap, nutritious meal for two, and who doesn’t love that when you are young, poor and hungry. At first I didn’t really enjoy it and I smothered it with cheese in order to forget that it wasn’t really pasta. After I graduated and decided to lead a veggie-friendly lifestyle I noticed my tastes changed. They say that the more vegetables you eat in your diet the more you crave. Well, that is certainly true for me.

While squash in itself is a north american commodity, this version of squash was actually created in China. Not exactly sure why or how, but that’s where it came from. It some how made it to North America where it has been loved ever since.

Spaghetti squash is really a super cool gourd. It’s a winter squash, so naturally it’s always best to eat it when it is in season. You can bake it (which is what I did today), boil it, steam it and microwave it. Like most squash it has seeds and bits on the inside that you have to scoop out. Those seeds can be roasted like you would roast pumpkin seeds. It really is a versatile squash and it is perfect for someone who is gluten free, paleo or just trying to watch their carb intake! Spaghetti squash comes in many different sizes and colors. I tend to get orange or yellow squashes because they have higher amounts of beta-carotene. You can usually find these squashes at your local super market, but if you want the freshest go to your nearest farmers market.

Ingredients:

  • 1 Spaghetti Squash
  • 1 cup of pasta sauce of your choice

For starters, pre-heat your oven to 375 degrees. Slice the squash in half lengthwise and scoop out the innards and seeds. Keep the seeds and separate them from the flesh if you want to bake them. I have a really easy recipe for roasted pumpkin seeds that you can use for the squash seeds!

When you are finished place the squash, cut side down in deep baking dish. You want to fill the dish with 1 or 2 cm of water. You are going to bake the squash with a steam bath, which allows the whole squash to be cooked evenly.

Place the squash in the oven and bake for about 40 minutes. You can test to see if the squash is cooked through by poking it with a fork. If the flesh of the squash starts to shred easily with a fork it’s done!

I also let the squash rest face down for 10 minutes and continue to let it steam cook. When it has cooled down a little, flip the squash over and start shredding the flesh with a fork.

DSC_0178 It should start shredding pretty easily. If it isn’t then it might need to cook for another 10 minutes or so.

DSC_0181 From here you can shred all of the flesh and then saute it in a pan with just butter and herbs and eat it that way, or you can eat it any way you would normally use pasta. In my case I love eating chunky, spice tomato sauce so that is what I made for dinner. I layered some cheddar cheese on top of the squash and then piled some spicy homemade pasta sauce with veggie sausage.

DSC_0182Serve, eat and enjoy!

DSC_0183If you are a spaghetti squash connoisseur please write your favorite recipe in the comments!

Happy fall! 🙂

Schweinebraten (German Pork Loin Roast)

Nurnburger Glühwein

So Schweinebraten is probably one of the most popular meat dishes in Germany (at least Bavaria) and it is one that we have often for a large family gathering. My Oma is German, from Nuremberg, and this is her simple recipe for a traditional Bavarian Schweinebraten. This is the super simplified version using a lean pork loin. Traditionally its best to make the Schweinebraten with a pork butt or a pork shoulder that still has a little of the fat and skin on top. The skin on the top is cut in a criss-cross pattern and cooked until it is crispy. Many of the authentic German flavors include cloves, juniper berries or mustard seed. My grandmother always like to keep the flavor of the meat simple, and that is my favorite way of preparing it simply because its grandmothers cooking. Try as many “authentic” versions of this recipe as you can if you are an avid meat-eater, you really can’t go wrong.

Usually this recipe accompanies some kind of dumpling, usually potato or bread (or sometimes both). I am biased towards kartoffelknödel (potato dumplings) because that’s what was served in our household. Maybe one day I will try my hand at another Bavarian recipe of Schweinebraten but for today I am going to share my families recipe.

Ingredients:

  • 1 lean Pork loin
  • 2 cloves of garlic
  • salt
  • pepper
  • garlic salt
  • Carrots, Leeks, Potatoes, and Onions for roasting (or any other kind of vegetable you like)
  • Olive Oil

Always bring your meat up to room temperature before you cook with it (i’m not exactly sure why if anyone wants to care to explain it to me. It was just told to me by my mother and I followed it). The secret to our perfect pork roast is the garlic. Cut the garlic gloves into long thin spires.2 cloves should be more than enough for a roast feeding about four people.

DSC_0002

The first thing you do with the pork loin is to cut little holes in the meat with a sharp knife. Make the holes about a half inch to an inch apart. Insert the garlic pieces into the holes in the meat. Repeat this until all of the holes are filled. I love garlic so I tend to shove a lot in there.

DSC_0006

Place it in a roasting pan with olive oil and all of the vegetables you want to roast with. The oven should be preheated to 400F. I only used carrots and onions this time, because my roommate hates celery and it was the only thing I had around. Leeks are especially good! Aside from delicious roasted vegetables, they are useful to have when cooking meat because they help make the stock used for the gravy. Traditional Schweinebraten is always eaten swimming in gravy.

DSC_0010

When the oven is ready, place the pork inside and cook for about 55 minutes. Remove the pork from the oven  and place it to rest on a cutting board or serving platter. Let the meat stand for about 10 minutes. Always wait for you meat to rest before slicing. If you slice too soon it will release all of the juices in the meat and leave the meat really dry. Remove the veggies from the dish. You should have a lovely veggie/meat juice left. If you are baking in a dish that is not stove-top friendly place the meat broth in a stove-top pot. Add in some salt, pepper, flour (to thicken) and maggi (not necessary but we never cook port roast without it).

Slice the meat and serve!

DSC_0015

I just made boiled potatoes and a simple salad to accompany the roast and carrots. I didn’t have the time to make the kartoffelknödel from scratch but don’t worry the recipe is coming! Instead try it with a traditional German potato salad or Kartoffelsalat.

What are some of your families meaty recipes? What do you love to eat with your pork roast?