Baked Spaghetti Squash (GF/Paleo Alternative)

us-lgflag

        I was first introduced to Spaghetti Squash by my roommate while I was in college. It was a cheap, nutritious meal for two, and who doesn’t love that when you are young, poor and hungry. At first I didn’t really enjoy it and I smothered it with cheese in order to forget that it wasn’t really pasta. After I graduated and decided to lead a veggie-friendly lifestyle I noticed my tastes changed. They say that the more vegetables you eat in your diet the more you crave. Well, that is certainly true for me.

While squash in itself is a north american commodity, this version of squash was actually created in China. Not exactly sure why or how, but that’s where it came from. It some how made it to North America where it has been loved ever since.

Spaghetti squash is really a super cool gourd. It’s a winter squash, so naturally it’s always best to eat it when it is in season. You can bake it (which is what I did today), boil it, steam it and microwave it. Like most squash it has seeds and bits on the inside that you have to scoop out. Those seeds can be roasted like you would roast pumpkin seeds. It really is a versatile squash and it is perfect for someone who is gluten free, paleo or just trying to watch their carb intake! Spaghetti squash comes in many different sizes and colors. I tend to get orange or yellow squashes because they have higher amounts of beta-carotene. You can usually find these squashes at your local super market, but if you want the freshest go to your nearest farmers market.

Ingredients:

  • 1 Spaghetti Squash
  • 1 cup of pasta sauce of your choice

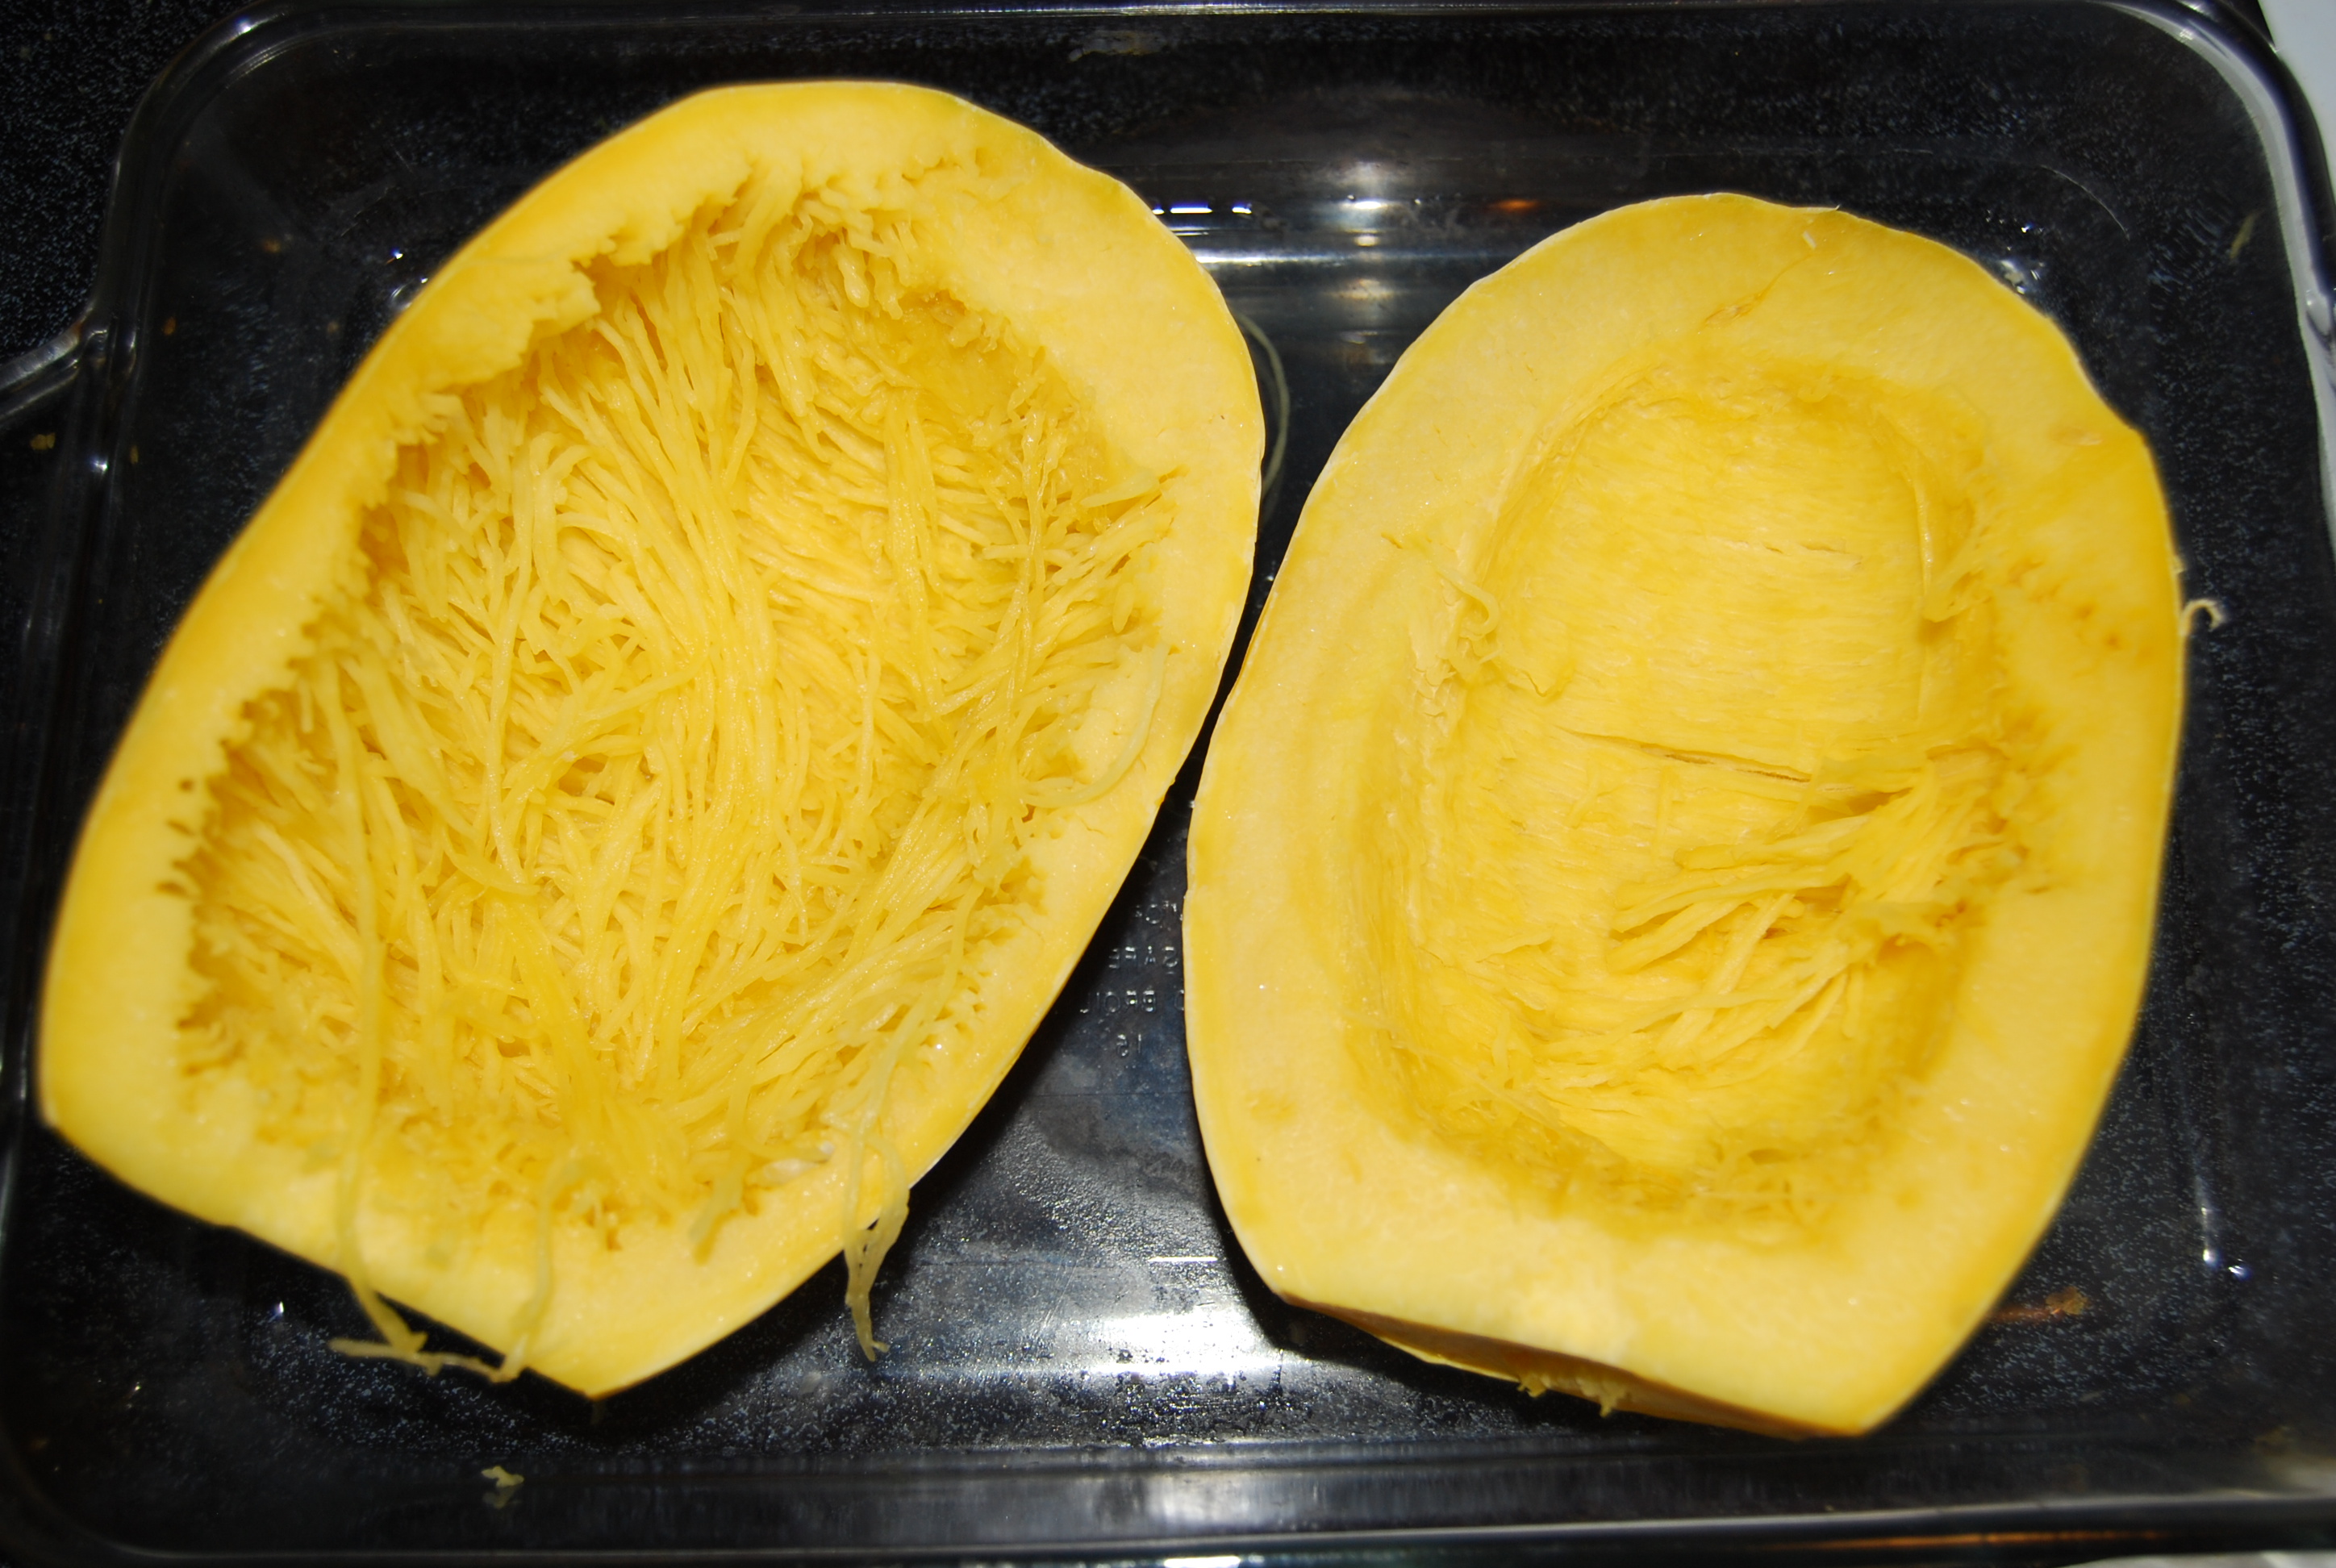
For starters, pre-heat your oven to 375 degrees. Slice the squash in half lengthwise and scoop out the innards and seeds. Keep the seeds and separate them from the flesh if you want to bake them. I have a really easy recipe for roasted pumpkin seeds that you can use for the squash seeds!

When you are finished place the squash, cut side down in deep baking dish. You want to fill the dish with 1 or 2 cm of water. You are going to bake the squash with a steam bath, which allows the whole squash to be cooked evenly.

Place the squash in the oven and bake for about 40 minutes. You can test to see if the squash is cooked through by poking it with a fork. If the flesh of the squash starts to shred easily with a fork it’s done!

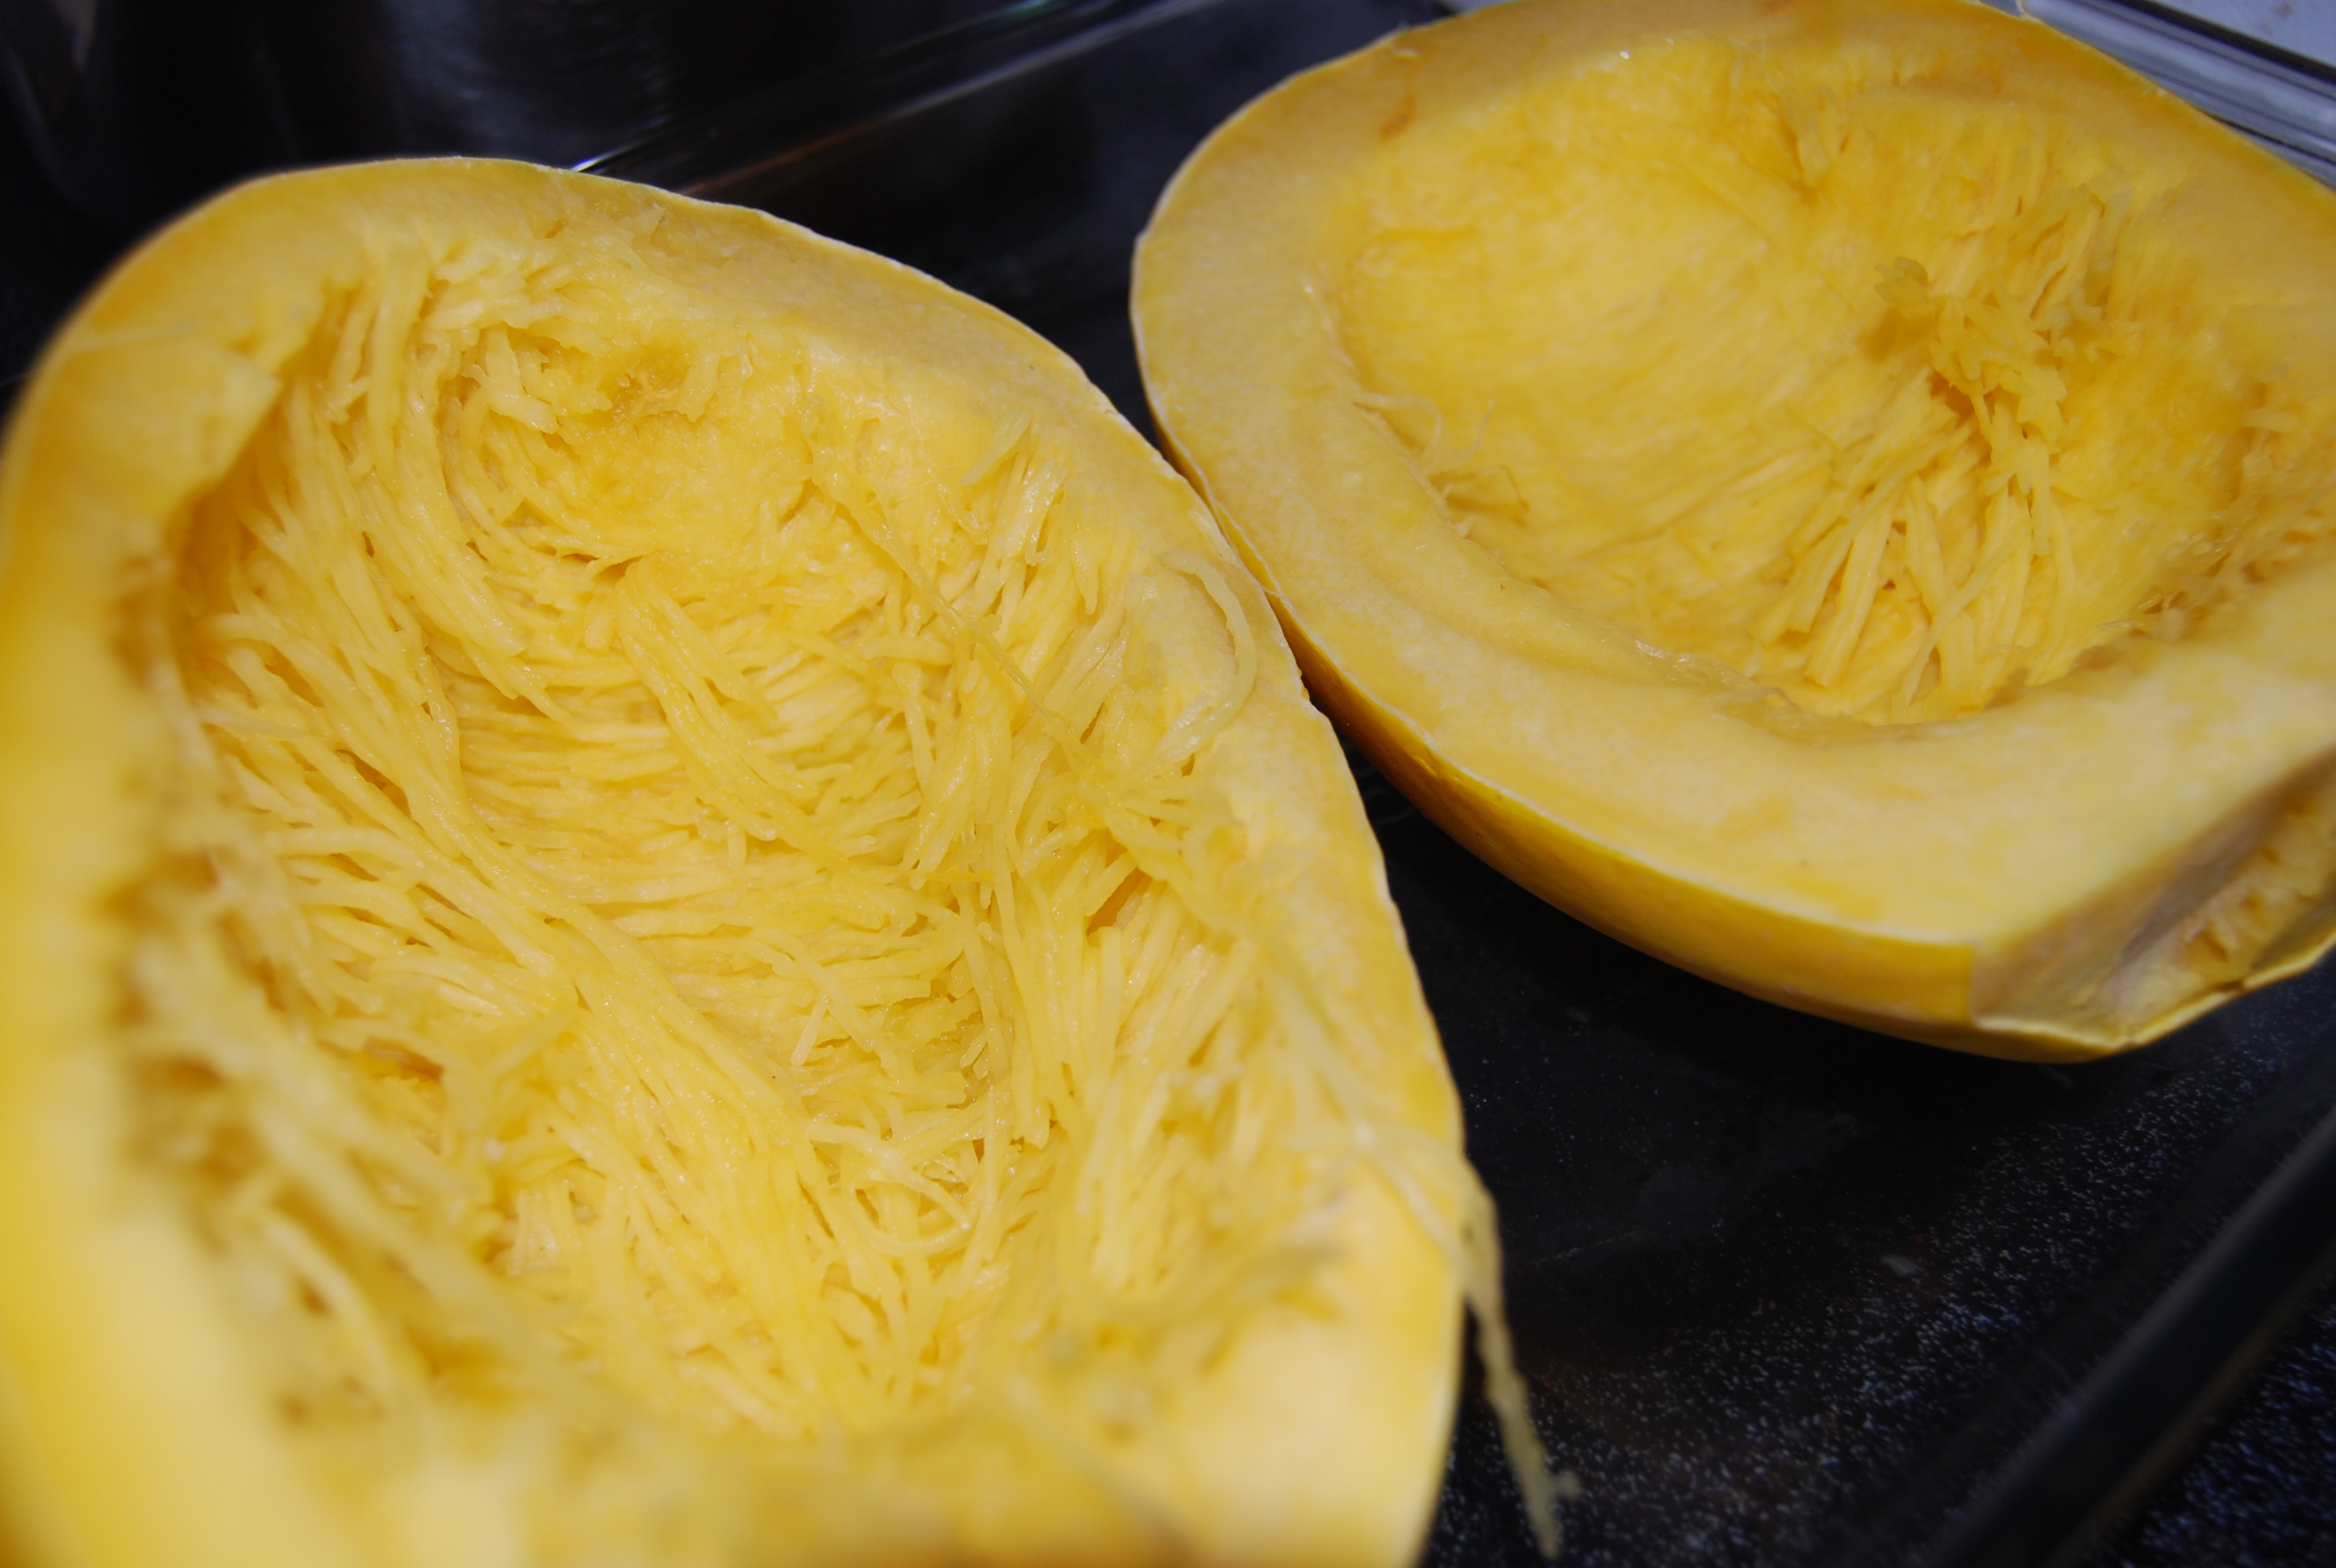
I also let the squash rest face down for 10 minutes and continue to let it steam cook. When it has cooled down a little, flip the squash over and start shredding the flesh with a fork.

DSC_0178 It should start shredding pretty easily. If it isn’t then it might need to cook for another 10 minutes or so.

DSC_0181 
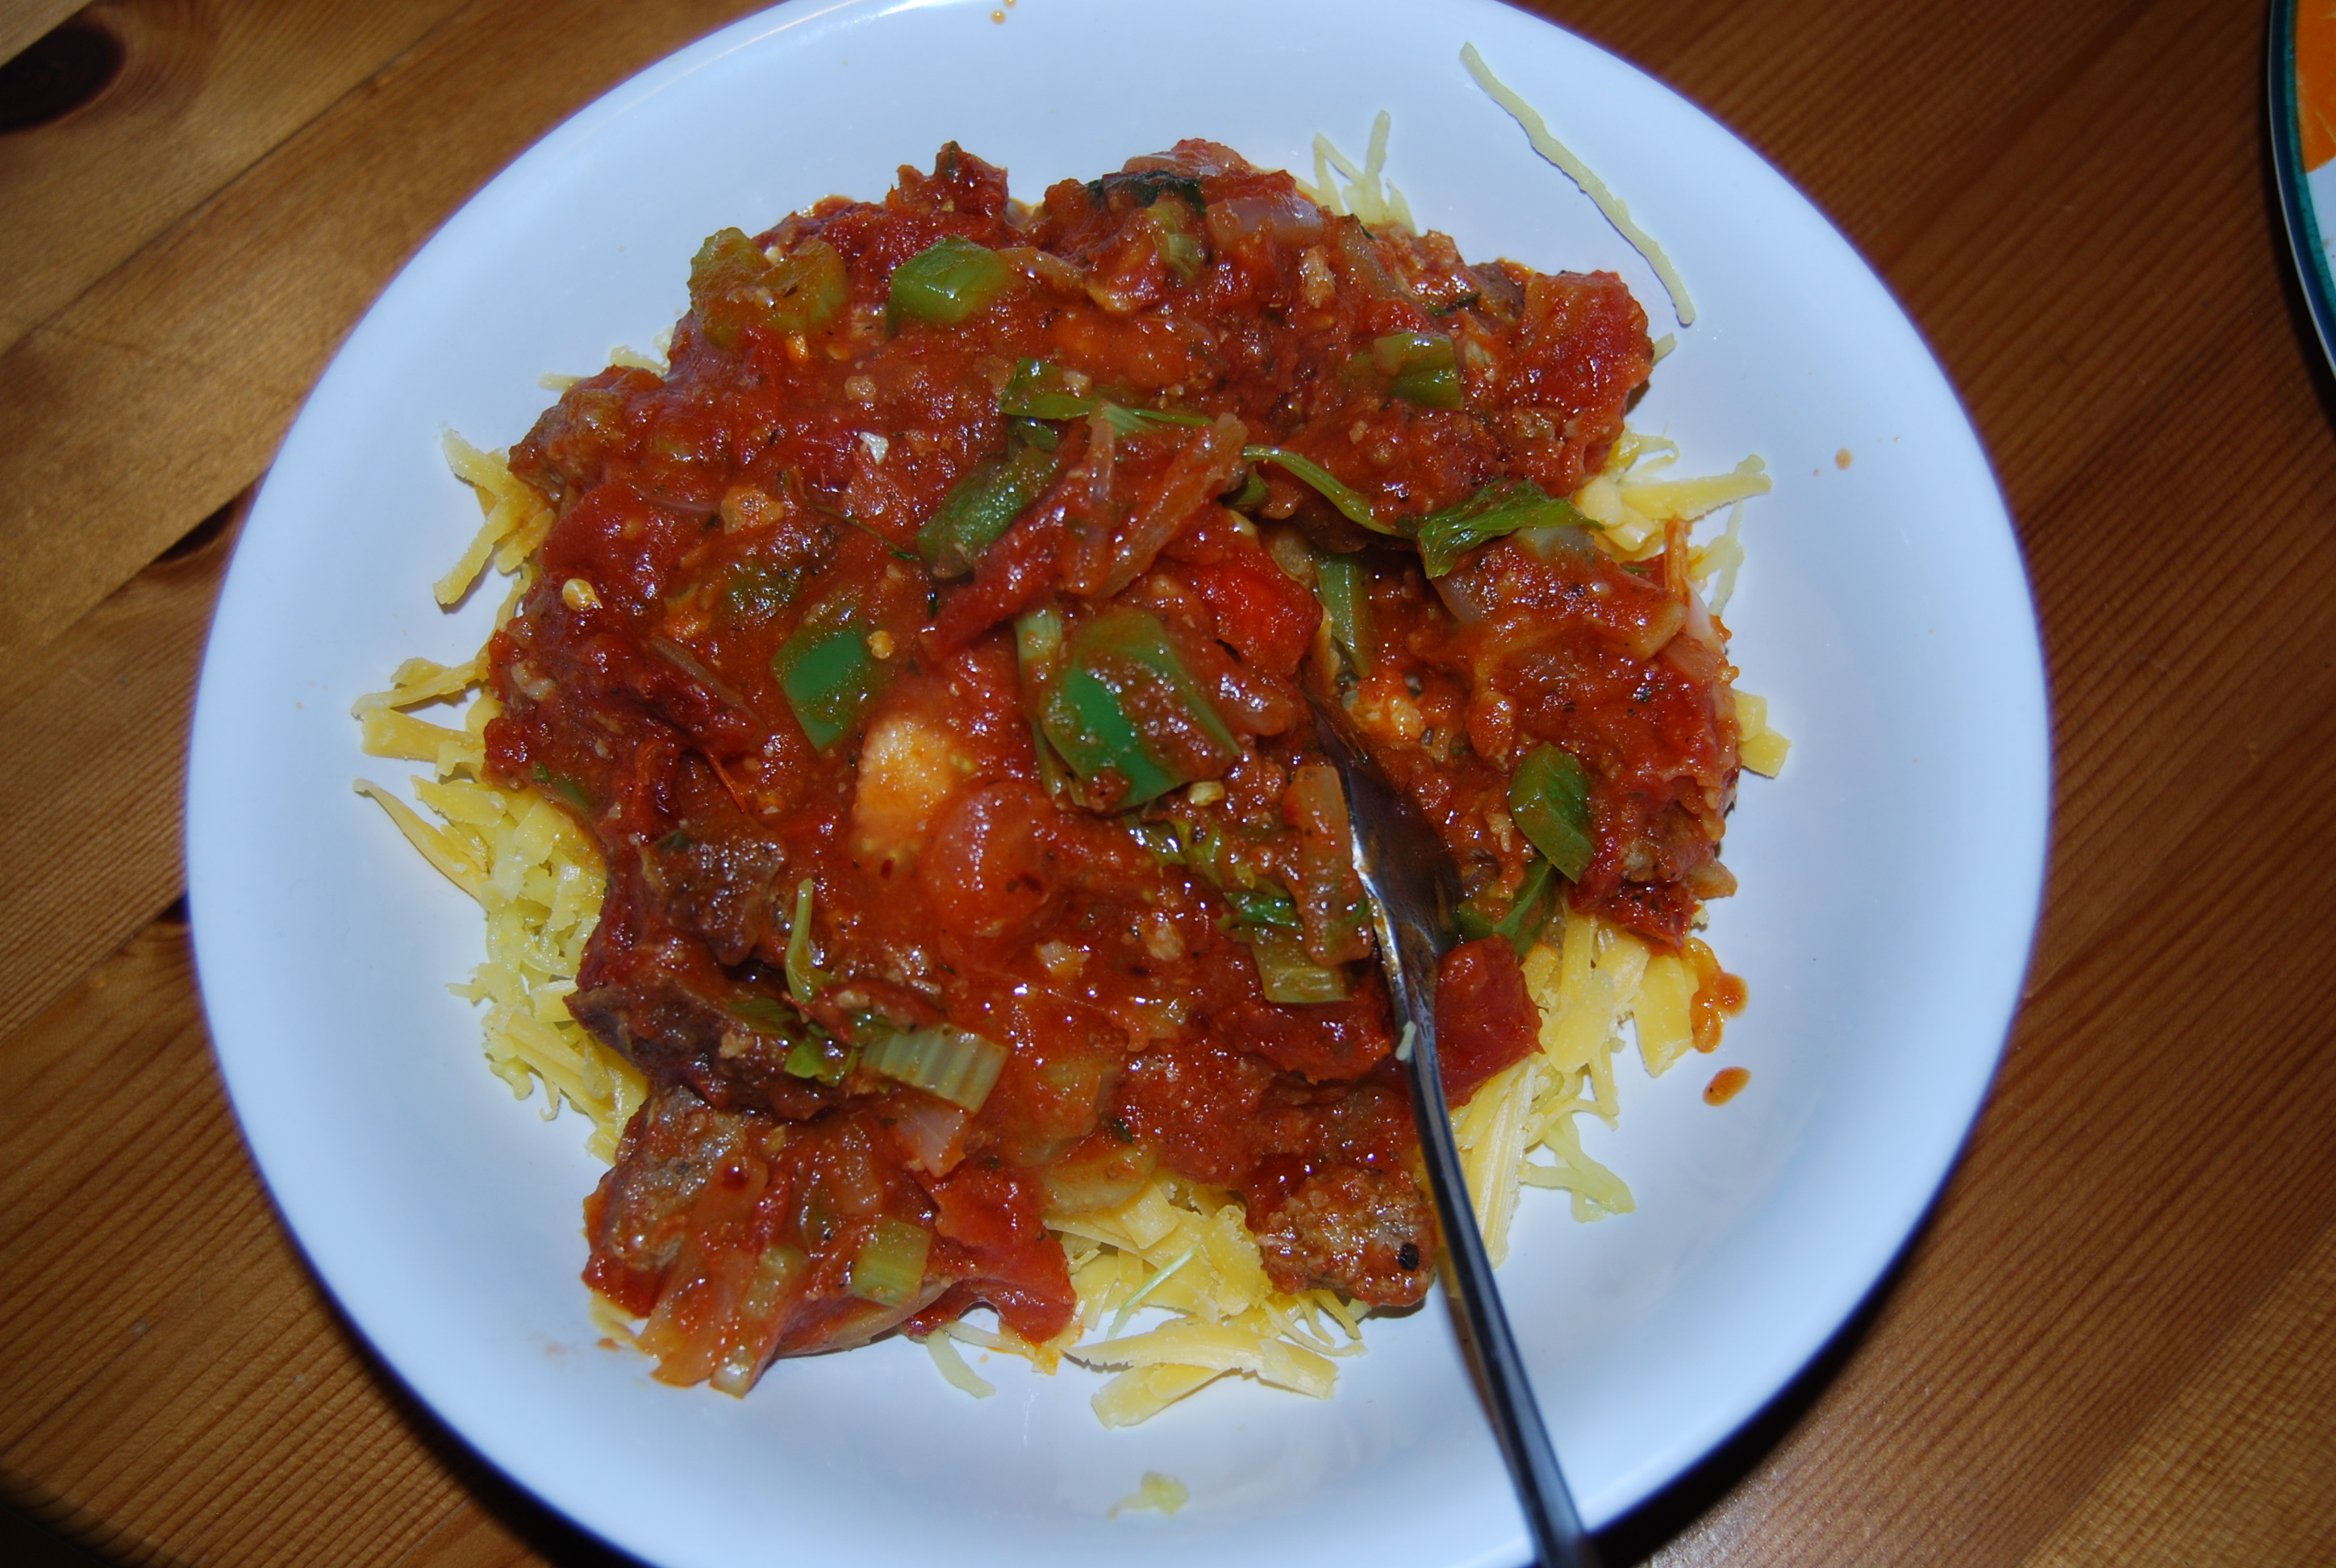
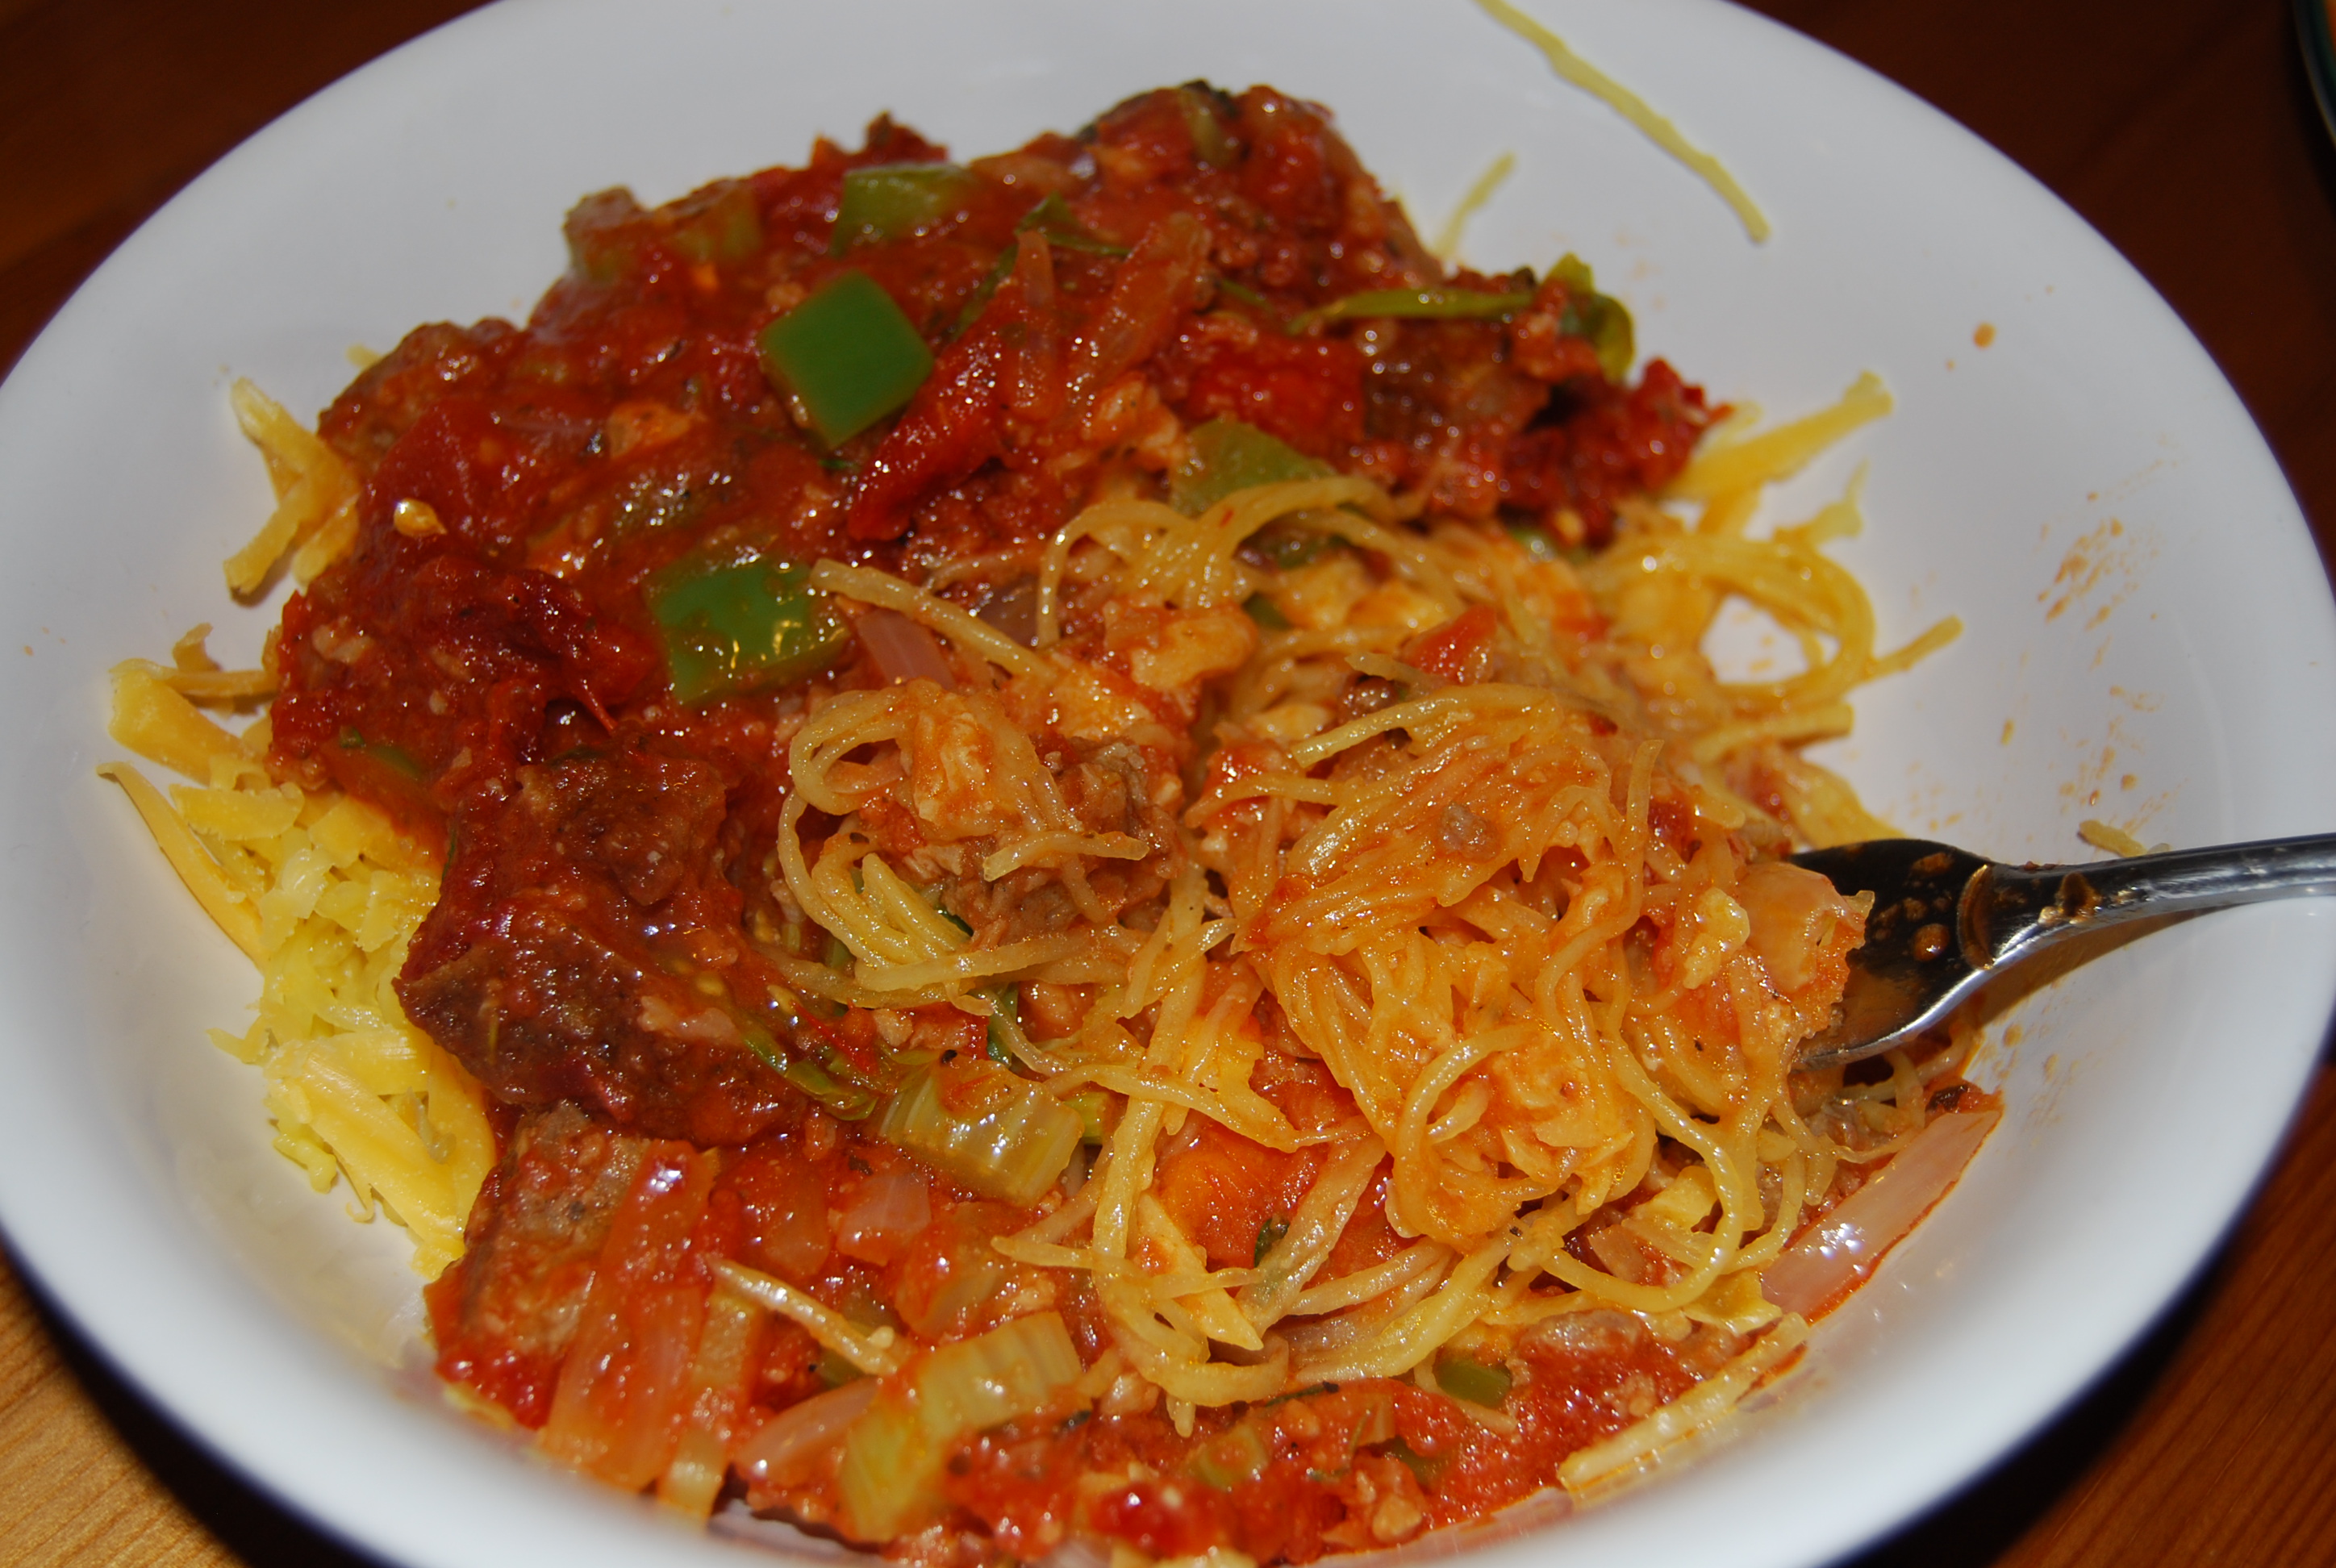
From here you can shred all of the flesh and then saute it in a pan with just butter and herbs and eat it that way, or you can eat it any way you would normally use pasta. In my case I love eating chunky, spice tomato sauce so that is what I made for dinner. I layered some cheddar cheese on top of the squash and then piled some spicy homemade pasta sauce with veggie sausage.

DSC_0182Serve, eat and enjoy!

DSC_0183If you are a spaghetti squash connoisseur please write your favorite recipe in the comments!

Happy fall! 🙂

Juicing from home!

It’s day 5 of my juicing cleanse/diet!

If you guys want to know more about juicing lifestyle check out this website. I thought it was super informative. 

I am starting to feel like I have a lot more energy, waking up in the morning has gotten slightly easier (and I am not a morning person)

I have also started a small workout routine with the boyfriend which is an effort to get back in shape so we can have any fun adventures this summer.

So here is an example of a fruit juice recipe you can try with your juicer!

Ingredients:

  • 1/2 lemon
  • 1 green apple
  • 4 carrot sticks
  • 4 strawberries
  • 1/3 of an English cucumber
  • a handful of kale or spinach (not pictured but its always good to have)

DSC_0016

This is what the juice looks like (sans kale):

DSC_0018

Kind of reminds me of V-8 Splash!

Another great fruit juice combo I love is

  • 1 pear
  • 1 green apple
  • 2 handfuls of kale
  • 2-3 carrots
  • 1/2 lemon or lime

What are some of your favorite juices.

Homemade Veggie Juice!

For a few months now I have been meaning to try a juicing cleanse. I’ve watched countless documentaries on the subject all raving about how good for your body nutrient rich juices are. Being as young and poor as I am, the idea of juicing seemed like a lot of money and work, an idea that wasn’t quite attainable. I managed to borrow a juicer that was probably from the 80’s, from my mom and Costco was actually not a bad place to load up on value sized veggie and fruits, so it ended up being fairly cost-effective.

You can also try to find older juicers at thrift stores! Juicers don’t really have to be fancy in order to make delicious juices, they just need to work.

My goal was a ten day juice cleanse, juicing all day for the first three days then gradually eating one meal a day of solid food. I didn’t quite stick to that, but I tried my best.

Most of the juices I made were fruity-green juices (I’ll post some more recipes below), but today I want to share my veggie juice. Think along the lines of V8.

Ingredients:

  • 2 stalks of celery
  • 4 stalks of carrots
  • 2 Roma tomatoes
  • two handfuls of Kale (or any other leafy green)
  • Half of an English cucumber
  • A dash of Tabasco

I like to start with the greens first so that they continue to juice the whole time. Really you just put all of the ingredients in the juicer and let it do its magic.

DSC_0088


I was at the Columbia City farmers market on Wednesday and I grabbed those angry greens and tomatoes. Super delish. This blend was very celery laden, so if you are not a big veggie fan tone it down a notch.

Once everything is juices you can add a dash of Tabasco if you like spice as much as I do. I wouldn’t recommend this juice if you are just starting juicing, as it can be a bit bitter. I’ve gotten used to the palate of juices so the bitterness doesn’t really bother me anymore.

DSC_0098

You can really go wrong with any juice recipe! Try making juice with whatever you have on hand.

Ill post a fruit juice recipe soon!


Post-Thanksgiving Turkey Soup!

us-lgflag

When most people think of thanksgiving leftovers they imagine piles and piles of turkey meat. My favorite part of the post-thanksgiving left over division is the turkey carcass. Why? Because you can make some badass turkey soup.

You might be sick of turkey after thanksgiving, but this soup is so warming and at least here in the pacific northwest its a good way to combat the cold rainy weather. I like to put lots of ginger and garlic in my soups, which contain lots of good nutrients and flu fighting properties.

Ingredients:

For the broth:

  • Turkey carcass
  • 1 Onion
  • 4 good sized carrots
  • 4 celery stalks
  • One inch cube of ginger, sliced
  • One whole garlic clove
  • Seasoning Spices (tyme, oregano, basil, fennel, ect)
  • Chili flakes
  • Bay leaf

For the soup:

  • Turkey Meat
  • 1 Onion
  • 4 good sized carrots
  • 4 celery stalks
  • 2 cups of Kale
  • One inch cube of ginger, sliced
  • One whole garlic clove
  • Spices
  • 1 bag/box of your choice of pasta

Basically you fill up a large soup pot and boil the water. When the water is boiled throw in all of the ingredients (except the turkey meat), wait for the water to boil again and then turn it down to simmer. Add salt and pepper to taste. Let it simmer for at least 6 hours, 8+ is recommended. This is just the process of making the base broth.

Its important to use vegetables as well as bones when you are making your broth, the mirepoix (onions, carrots, celery) are often the base for many dishes because they provide a lot of flavor and a relatively low cost. With any soup base you are making be sure to add the mirepoix!

DSC_0120

Having the skin boiling will really add to the flavor of the broth, its full of delicious fat that gives that warm homemade flavor. Don’t worry, there are also ways to trim the fat of the soup down without compromising the flavor.

After about 8 hours drain all of the bones/veggies from the broth into another soup pot.

You can either add in more onions, veggies, spices and the turkey and eat the soup or you can reduce the fat of the soup by putting the broth in the soup pot in the fridge over night. As the broth cools in the fridge the fat travels to the surface and solidifies. In the morning this leaves a layer of solid fat at the top which you can just simply skim off. Personally, and some people may disagree, I don’t think that this takes any of the flavor away.

At this point I like to separate about half of the broth and freeze it.

I take the rest of the broth, add in the mirepoix, turkey meat, spices pasta and kale (or any other things you might like in your broth). I love kale. Add salt and pepper to taste. Bring the soup to a boil, wait for the veggies and pasta to be al dente (probably around 12 minutes and serve.

If you are like me and hate mushy pasta, take your remainder soup off the burner to prevent your pasta from over cooking after you serve, or place them in storage containers.

DSC_0004

Now feast! Its pretty amazing how delicious the broth can get, and its only flavored by salt. The longer you let the broth cook, the more flavor you can get. I try not to make soup with any soup power bases. I feel good knowing exactly where my flavor is coming from!

Does anyone have any good turkey soup variations? Or any turkey day left over favorites?

Fall Treats! Candied Pumpkin Seeds!

So if you are anything like me, you hate seeing good food go to waste. I love to make pumpkin seeds after I carve out my pumpkins. They are easy, delicious and super festive (and I do like getting into the seasonal spirit).

Last month me and the boyfriend did the traditional pumpkin carving in preparation for halloween. I went pretty simple this year:

The pumpkin seeds are definitely the reason why I carve pumpkins now.

Baking pumpkin seeds was actually never anything that we normally did in my house growing up. I just decided one year I was going to do it, and I’ve been doing it ever since. I like to experiment with all sorts of different flavors. I would recommend trying chipotle seasoned pumpkin seeds and curried pumpkin seeds.

This year, however, I went sweet.

Ingredients:

  • Seeds from one pumpkin, cleaned and dried over night.
  • 1/2 c of evoo
  • 1/2 c of brown sugar
  • 1 tbsp of cinnamon
  • 1 tsp of pumpkin pie spice (or equal amounts of ground cloves, ginger and nutmeg)

Basically once you have taken the seeds out of the pumpkin and have given them a good washing to remove the fleshy bits you can set them out on a towel to dry overnight.

The next day simply remove the seeds from the towel and place them in a mixing bowl. Preheat the oven to 350 degrees.

Throw in the olive oil, brown sugar and spices. mix until well coated then place the seeds on a greased cookie sheet.

Once the oven reaches the appropriate temperature sit those babies in there for about 20-25 minutes. You can take them out and give them a stir at the halfway mark if you want. They should be pretty golden brown at the end.

Put them in your favorite serving dish and amaze your friends with your delicious treats.

Look at that sweet delicious treat! It really is that easy to make.

Me and the roomie relaxed in true fall spirit by watching an awesome horror slasher flick.

What are some of your favorite fall treats?

Raw Vegan Cheesecake

So for the past year  I’ve been following a series of YouTube videos called My Drunk Kitchen. It is every bit as delightful as it sounds. One of her episodes featured drunkenly creating raw vegan cheesecake. I am not in any way Vegan, I love chicken and cheese way too much to ever give them up for more the 4 months at a time. However, I do believe in sustainable eating and experimentation so I have developed a fondness for vegan baking. While there is no actual baking involved in raw vegan cheesecake, I still put it under the category of baked goods.

Here is a link to My Drunk Kitchen. I encourage you all to check it out because Hannah Hart is fucking hillarious and I want her to be my BFF.

So this recipe definitely requires a food processor or (in my case) a high powered blender. The better the blender the creamier the cheesecake will turn out.

Ingredients:

For the crust:

  • 2/3 cups of walnuts
  • 2/3 cups of dates
  • 1/2 cup of unsweeted shredded coconut (I omitted this this time because the guy is really allergic to coconut)
  • 1/2 tsp sea salt or kosher salt

For the filling:

  • 2 cup of raw cashews that have been soaked in water for at least 4 hours (soaking them overnight is best)
  • 1/2 cup of organic raw coconut oil that has been melted
  • 1/2 cup of agave nectar (or honey if you have that instead)
  • 1 tbsp of vanilla extract (or vanilla bean if you have it, which, since i’m poor, I did not)
  • Juice of two lemons
  • 1 cup of strawberries, or any berries you choose to use!
  • Hand full of assorted berries to garnish

Okay, so first thing we have to make the crust. You can do this in any pie dish.

Combine the walnuts, dates salt and coconut in a food processor and blend until you can mold the mixture. Place the mixture in the pie pan and put in the freezer to chill while you make the filling.

In a large food processor or blender, blend the soaked cashews, coconut oil, vanilla, agave and lemon together until the mixture is smooth. I used a blender and this took a decent amount of time to get all the mixture smooth enough.

For this recipe I poured half of the cashew filling into the pie pan and then blended the remainder with the strawberries. If you are using frozen strawberries, you should thaw them first before you try to blend them on high with the cashew mixture. Its up to you how blended you want them, you can blend it smooth or leave chunky bits of strawberry, you can’t really go wrong. Pour the berry mixture onto the other mixture and smooth with a spatula.

Store this in the freezer until the mixture gets pretty solid, I would say at least an hour. Take the cheesecake out of the freezer 30 mins before you want to serve it. You can either keep the leftovers in the freezer or store in the fridge if you don’t mind the texture being a little softer. Throw some berries on top and enjoy!

I was surprised at how rich and creamy this turned out, being made mostly from nuts. The lemon adds the perfect tang to the mix, mimicking actual cheesecake perfectly. After making this a few times it has become a family favorite and I don’t think I’ll go back to “normal” non vegan cheesecake.

I think next I’m going to experiment with chocolate vegan cheesecake or orange flavored cheesecake. The possibilities are endless!

This post it even making me hungry. I have one last slice of cheesecake left. I think I’ll go enjoy it!

Pumpkin Cupcakes With Cream Cheese Frosting

 So here is the cupcake recipe I used with my freshly made pumpkin puree. This recipe calls for 2 cups of pumpkin puree. The batch I made resulted in probably 10 cups of puree from a medium sized pumpkin. This batch of pumpkin puree should make more then two dozen cupcakes. One pumpkin = over 50 pumpkin cupcakes. Sounds good to me! I tend to use healthier versions of ingredients but anything can be swapped out if you prefer the standard ingredients.

Pumpkin cupcakes are perfect for breakfast on the go (which is a must for me since I am in no way, shape or form a morning person). And these taste great with a home made pumpkin spice latte or eggnog latte.

This recipe is a little more on the moist, dense side of cupcakes which is just my personal preference. This is not your typical fluffy cupcake!

Ingredients:

  • 1 1/2 cups whole wheat flour
  • 1 1/2 cups all purpose flour
  • 1 cup of stevia (or sugar)
  • 1/2 cup of oil
  • 1/2 cup of agave syrup (or honey/molasses, or one cup oil if you don’t want added sweetener)
  • 3 eggs beaten
  • 2 cups pumpkin puree
  • 2 tsp vanilla extract
  • 2 tsp baking soda
  • 2 tsp cinnamon
  • 1 tsp nutmeg
  • 1 tsp ground cloves
  • 1/2 tsp baking powder
  • 2/3 cup of skim milk (or water)
  • 1 tsp salt

Okay so with cupcakes the biggest thing is to mix the dry ingredients together and the wet ingredients together.

Preheat the oven to 350 degrees F. Line a cupcake baking pan with cupcake liners (fall inspired ones preferred :-p)

Combine the flour, sugar/stevia, spices, baking soda, baking powder and salt together in a mixing bowl.

Next combine the ‘wet ingredients’ together or the oil, agave, eggs, pumpkin puree. vanilla extract and milk.

Once both are well mixed slowly add the dry ingredients to the wet ingredients, folding them in together until they are all mixed and there are no pockets of flour. Try not to over mix!

Once the mix is blended fill the cupcake liners 2/3 of the way. The cupcakes will rise and we don’t want them to mushroom!

Put them in the oven for 25-30 mins and let them rest a little. You can check if they are done by poking them with a fork. If the fork comes out clean they are ready.

Once they have cooled a little frost them! I love cream cheese frosting but to each their own. For these cupcakes I just mixed a little cream cheese with about a half a tin of vanilla frosting I had sitting in the fridge with some food coloring, cinnamon and orange zest. If you feel like living dangerously add some melted butter.

Enjoy!

Pumpkin Puree

Fall is here! Which means that its Gourd season. I capitalize on the abundance of squash and pumpkin by making purees, soups, bakes, cupcakes, pumpkin bread, ect. There really is no limit to what you can make with squash and it’s always extremely delicious.

Today I am making Pumpkin Puree, which trumps can store bought canned pumpkin puree. The pumpkin is an American fall staple, and is the symbol for Halloween (my favorite holiday).

Research has told me that smaller pumpkins generally pack more flavor in the puree, but that is debatable. The pumpkin I used was smallish, only because its was easy to handle.

Ingredients

  • One smallish pumpkin (depending on how much you want to make, a small pumpkin can provide puree for three dozen pumpkin cupcakes).
  • A table spoon each of any spices you want to add to the puree (Im making this for cupcakes or bread so I like to add the traditional puree spices of cinnamon, cloves and ground ginger).
  • A sweetener, I used about three table spoons of agave syrup. Agave provides an almost brown sugar smokiness without the sugarness.
Take your pumpkin and remove the top and stem. Then cut the pumpkin in half.
Remove all of the seeds and inner bits. I find using a spoon is the mess free answer but many people like using there hands.
Protip: save the seeds for later! Pumpkin seeds are delicious you just soak them, dry them. Place them on a oiled baking sheet and apply salt, pepper or any other flavors you desire and put them in the oven at 325 F for about 25 mins. I like putting on a little seasalt with pepper and chipotle spice.
Now place the pumpkin face down on a baking pan with one cup of water (this helps to steam the pumpkin and cook the flesh). Put them in a 350 F over for about 45 minutes or until the pumpkin is tender when you prod it with a fork.
When its done, the skin should easily be peeled off of the pumpkin. Cut in chunks and place inside of a food processor. As you can see my food processor is on the small side which makes the whole process rather annoying, but it’s all worth it in the end.
As you can see that smallish pumpkin packed a lot of puree! If you do not have a food processor you can use and blender, or potato masher or ricer. I added my spices and sweetener when i pureed it but many people like to keep it pure. Add water if it looks too solid!
You can use this puree in a recipe right away or store some in the freezer for later. I like to store them in cup sized tupperware so its easy to pull out for baking!
What do you guys think about fresh pumpkin puree? What would you use it to cook with?